Quick & Easy Pickled Red Onions Recipe
Pickled red onions are one of those culinary superheroes that can transform a dish from ordinary to absolutely extraordinary with just a few vibrant slivers. Seriously, I can’t get enough of them! There’s something so utterly delightful about the way their sharp, slightly sweet tang cuts through richness, or how their gorgeous fuchsia hue instantly brightens up any plate. People adore pickled red onions because they’re incredibly versatile. They’re a star on tacos, burgers, salads, sandwiches, avocado toast, and even charcuterie boards. What makes this simple condiment so special is its ability to add a burst of flavor and a pop of color with minimal effort. They’re surprisingly easy to make at home, requiring just a few pantry staples and a little bit of patience. So, get ready to embrace the magic of pickled red onions and elevate your everyday meals!
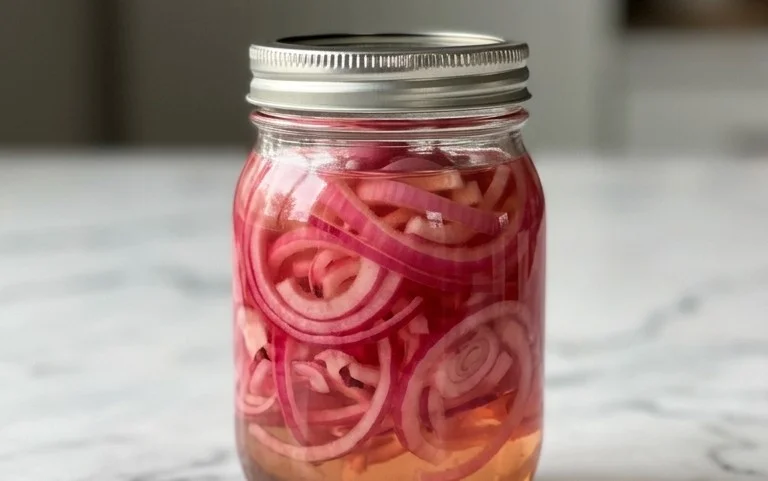
The Vibrant Punch of Pickled Red Onions: Your New Culinary Best Friend
There are few condiments that can instantly elevate a dish quite like a vibrant, ruby-red pickled onion. Their tangy, slightly sweet, and wonderfully crunchy texture is a game-changer for everything from tacos and salads to sandwiches and charcuterie boards. And the best part? Making them at home is astonishingly simple, requiring just a handful of basic ingredients and a little bit of patience. Forget store-bought versions that can be overly sweet or lack that perfect bite; this recipe will empower you to create pickled red onions that are consistently delicious and customizable to your own taste.
These beautiful, jewel-toned rings aren’t just a pretty garnish; they’re a flavor powerhouse. The pickling process transforms the sharp bite of raw red onion into a delightful tang, with a subtle sweetness that balances the acidity. They add a welcome textural contrast, cutting through richer flavors and bringin extractg a bright, fresh note to any meal. Once you start making them, you’ll find yourself reaching for them constantly. They are incredibly versatile, adding a gourmet touch to even the most everyday dishes. Think of them as your secret weapon in the kitchen, ready to rescue a meal that needs a little something extra.
Ingredients:
Crafting Your Crimson Jewels: The Pickling Process
The magic happens in a few straightforward steps. It’s a process of maceration and infusion, where the vinegar solution gently softens the onions and imbues them with its signature tang. The initial prep work is minimal, and the rest is just waiting time for the flavors to meld beautifully.
1. Prepare the Onion: First things first, let’s get our star ingredient ready. You’ll want to peel the red onion. Start by trimming off the top stem end, but leave the root end intact for now – this helps keep the onion together as you slice it, making for prettier rings. Stand the onion upright on its flat, trimmed end. Carefully slice the onion in half through the root. Now, you can easily peel away the papery outer skins. Once peeled, you’ll want to slice the onion thinly. Aim for rings about 1/8 to 1/4 inch thick. A mandoline slicer is fantastic for achieving perfectly uniform slices, but a sharp knife works wonderfully too. The goal is consistency so that each ring pickles evenly. Discard the root end after slicing.
2. Prepare Your Vessel and Brine: While you’re slicing your onion, get a clean glass jar ready. A pint-sized jar is usually perfect for this quantity. Make sure it’s been washed thoroughly with hot, soapy water and rinsed well, or even better, run it through a hot dishwasher cycle. This ensures a clean environment for pickling. Now, let’s make the pickling brine. In a small saucepan, combine the 1 cup of white vinegar, 1 cup of water, 1 tablespoon of sugar (or your chosen sweetener), and 2 teaspoons of kosher salt. Place the saucepan over medium heat.
3. Heat and Dissolve the Brine: Gently heat the mixture, stirring occasionally, until the sugar and salt have completely dissolved. You don’t need to bring it to a rolling boil; just ensure everything is fully incorporated into the liquid. Once dissolved, remove the saucepan from the heat. This hot brine is crucial for helping the flavors penetrate the onions quickly and efficiently. Allowing the salt and sugar to dissolve fully is key to achieving a balanced flavor profile. Undissolved granules can lead to a gritty brine and an uneven taste.
4. Combine and Submerge: Carefully place your thinly sliced red onion rings into your clean glass jar. Pack them in there snugly, but don’t cram them so tightly that you can’t pour the brine around them. Once the onions are in the jar, carefully pour the warm, dissolved brine over them. Make sure the onion slices are completely submerged in the liquid. If some pieces are floating, gently press them down with a spoon or another clean utensil to ensure they are all covered. This even submersion is vital for uniform pickling. You should see the beautiful color of the onions begin extract to deepen almost immediately as they interact with the brine.
5. The Waiting Game (and How to Speed It Up!): This is where the real magic happens, and it’s remarkably hands-off. Let the jar sit at room temperature for at least 30 minutes to an hour. You’ll notice the onions starting to soften and take on a beautiful, translucent pink hue. For a milder, slightly crisper pickle, this initial room-temperature period is sufficient. However, for that signature tangy, vibrant flavor and a softer texture, you’ll want to refrigerate the jar. After the initial 30-60 minutes at room temperature, seal the jar tightly and place it in the refrigerator. The onions will continue to pickle and develop more flavor as they chill. For the best results, allow them to chill for at least a few hours, but ideally overnight. The longer they sit in the brine in the refrigerator, the more intense and delicious they will become. They will continue to improve for up to two weeks in the fridge.
And there you have it! Incredibly simple, yet astonishingly rewarding. Your homemade pickled red onions are ready to be enjoyed. Use them generously to add a burst of color and flavor to your favorite dishes. They are truly a versatile condiment that you’ll be glad you learned to make.
Conclusion:
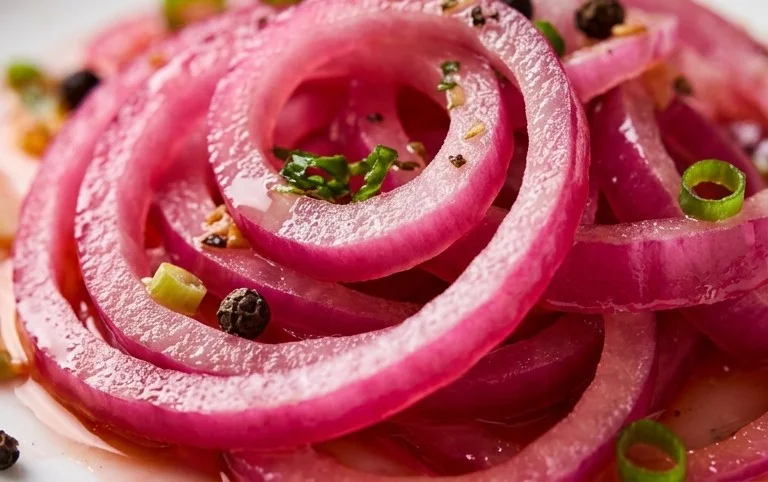
There you have it! Making your own pickled red onions is incredibly simple, and the payoff is immense. These vibrant, tangy delights are a true kitchen superhero, transforming everyday dishes into something special with just a few minutes of prep. Their bright acidity cuts through richness, adding a fantastic pop of flavor and color to everything from tacos and sandwiches to salads and avocado toast. I truly encourage you to give this recipe a try – you’ll wonder how you ever lived without them!
Beyond the classic, feel free to experiment. Add a pinch of chili flakes for a touch of heat, a few peppercorns for extra spice, or even a sprig of fresh dill for an herbaceous twist. The possibilities are nearly endless, and each variation will bring its own unique charm to your pickled red onions. So grab those red onions and get pickling – your taste buds will thank you!
Frequently Asked Questions:
Q: How long do pickled red onions last?
A: Properly stored in an airtight container in the refrigerator, your pickled red onions should last for at least 2-3 weeks. The brine acts as a preservative, keeping them fresh and delicious.
Q: Can I use a different type of onion?
A: While red onions are ideal due to their color and slightly milder flavor when pickled, you can technically use white or yellow onions. However, they won’t have the same beautiful pink hue, and their flavor profile will be a bit different. Red onions are definitely the star for this particular recipe!
Q: What if I don’t have apple cider vinegar?
A: You can substitute white grape juice vinegar or even distilled white vinegar. Just be aware that the flavor profile might change slightly. Apple cider vinegar provides a lovely balance of sweetness and tang that works exceptionally well with the red onion’s natural flavor.
Quick Pickled Red Onions
Tangy and vibrant pickled red onions, perfect for adding a zesty kick to tacos, sandwiches, salads, and more. This quick recipe is easy to make and requires minimal ingredients.
Ingredients
-
1 large Red onion, thinly sliced
-
1 cup White Vinegar
-
1 cup Water
-
1 tablespoon Sugar
-
2 teaspoons Kosher salt
Instructions
-
Step 1
Thinly slice the red onion into rings or half-moons. -
Step 2
In a small saucepan, combine the white vinegar, water, sugar, and kosher salt. Stir until the sugar and salt are dissolved. -
Step 3
Bring the mixture to a simmer over medium heat. Once simmering, remove from heat. -
Step 4
Place the sliced red onions into a clean jar or heatproof container. -
Step 5
Pour the hot vinegar mixture over the onions, ensuring they are fully submerged. -
Step 6
Let the onions cool to room temperature, then cover the jar and refrigerate for at least 30 minutes before serving. They will become more flavorful as they pickle.
Important Information
Nutrition Facts (Per Serving)
It is important to consider this information as approximate and not to use it as definitive health advice.
Allergy Information
Please check ingredients for potential allergens and consult a health professional if in doubt.