Easy Recipe Loading – Delicious & Quick Meals
Loading… is that magical dish that instantly brings a smile to my face and a rum extractble to my stomach. There’s a reason why Loading… has earned its legendary status; it’s pure comfort food at its finest, a culinary hug that never fails to deliver. What makes Loading… so universally adored? It’s the perfect harmony of textures and flavors – the tender, yielding main event complemented by a symphony of savory toppings and a base that’s both satisfying and soulful. Each bite is an adventure, a delightful exploration of familiar yet exciting tastes. This isn’t just a recipe; it’s an experience, a way to create a moment of pure joy in your own kitchen. Get ready to fall in love all over again with this incredible Loading…
Ingredients:
Flavorful Chicken Thighs: A Simple Weeknight Wonder
Welcome to a recipe that’s about to become your new go-to for delicious, fuss-free meals. We’re diving into the simple yet incredibly satisfying world of perfectly cooked chicken thighs. Forget bland, dry chicken – this recipe is designed to deliver moist, tender, and bursting-with-flavor results every single time. Chicken thighs are incredibly forgiving, which makes them a fantastic choice for both novice cooks and seasoned chefs looking for a reliable winner. Their higher fat content means they stay wonderfully juicy, even if you accidentally leave them on the heat a minute or two longer than intended. This recipe focuses on creating a beautifully seasoned crust that locks in all those delicious juices.
The Art of Preparation
The first crucial step in achieving perfectly cooked chicken isn’t actually about cooking at all; it’s all about preparation. Take your boneless, skinless chicken thighs and lay them out on a clean surface, like a plate or a cutting board. Now, here’s a pro tip that makes a world of difference: grab some paper towels and thoroughly pat each chicken thigh dry. This might seem like a minor detail, but it’s incredibly important. By removing excess moisture from the surface, you’re creating the ideal canvas for your seasonings to adhere to. A dry surface allows the spices to stick directly to the meat, rather than sliding off with any lingering water. This leads to a more robust and evenly distributed flavor, and it’s the secret to developing that desirable, slightly crisped exterior we all love. Once your chicken is beautifully dry, it’s ready for its flavor transformation.
Seasoning for Success
Now for the fun part – bringin extractg on the flavor! In a small bowl, combine your olive oil, smoked paprika, garlic powder, onion powder, dried oregano, salt, and black pepper. Whisk this mixture together until it forms a smooth, fragrant paste. This seasoned oil is your flavor vehicle. Gently coat each of the patted-dry chicken thighs with this delicious mixture. Make sure to get a good, even coating on all sides. Don’t be shy; massage the seasoning into the meat. This ensures that every bite will be infused with the savory goodness of the spices. If you’re feeling adventurous, this is also a great time to add a pinch of cayenne pepper for a touch of heat or some fresh chopped rosemary for an extra herbaceous note.
Cooking to Perfection
Pan-Searing for a Beautiful Crust
To begin extract cooking, heat a large skillet (cast iron works beautifully here) over medium-high heat. Once the skillet is nice and hot, carefully add the seasoned chicken thighs in a single layer. Be sure not to overcrowd the pan; if necessary, cook in batches to ensure each piece has enough space to sear properly. Overcrowding will steam the chicken rather than sear it, and we’re aiming for that lovely golden-brown crust.
Allow the chicken to cook undisturbed for about 5-7 minutes per side. You’re looking for a beautiful, deep golden-brown color to develop. This searing process is what creates a fantastic texture and locks in those precious juices. Resist the urge to move the chicken around too much during this initial searing phase; let it develop that crust.
Finishing the Cook
Once both sides have been nicely seared, reduce the heat to medium-low. You can cover the skillet with a lid at this point, or if you prefer a slightly more controlled cooking environment, you can transfer the skillet to a preheated oven at 375°F (190°C).
Continue to cook the chicken for another 10-15 minutes, or until it reaches an internal temperature of 165°F (74°C). This is where a meat thermometer becomes your best friend. Insert the thermometer into the thickest part of a chicken thigh, making sure it doesn’t touch any bone (though these are boneless, so that’s less of a concern). Using a thermometer is the most reliable way to ensure your chicken is perfectly cooked – safe to eat and wonderfully tender. Overcooking is the enemy of juicy chicken, so pay close attention to that temperature.
The Crucial Resting Period
Once your chicken has reached the magic number of 165°F (74°C), carefully remove the skillet from the heat or take it out of the oven. Transfer the cooked chicken thighs to a clean plate or cutting board. Now comes perhaps the most overlooked but equally important step: letting the chicken rest. Cover the chicken loosely with aluminum foil and let it rest for at least 5 minutes. This resting period is absolutely vital. During cooking, the juices in the chicken are pushed to the center. By allowing it to rest, you give those juices time to redistribute back throughout the meat. If you slice into the chicken immediately, all those delicious juices will run out onto your plate, leaving you with drier chicken. This short wait will result in incredibly succulent and flavorful chicken with every single bite.
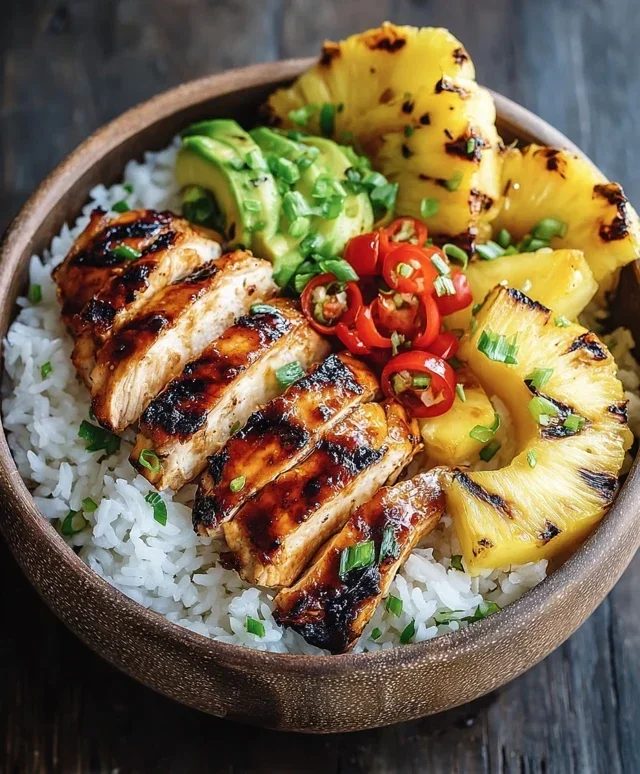
Once rested, your flavorful chicken thighs are ready to be served. You can slice them and serve them over rice, alongside your favorite vegetables, or toss them into a salad. Garnish with fresh parsley if desired for a pop of color and freshness. Enjoy this simple yet profoundly satisfying dish!

Conclusion:
I hope you’re as excited to try this “Loading…” recipe as I am to share it! It truly is a remarkable dish, offering a delightful balance of flavors and textures that I think you’ll absolutely love. The beauty of this recipe lies in its simplicity, yet it delivers an incredibly satisfying and memorable culinary experience. Whether you’re a seasoned cook or just starting out, you’ll find this recipe accessible and rewarding.
This “Loading…” creation is wonderfully versatile. It shines as a standalone meal, perfect for a weeknight dinner when you want something delicious without a lot of fuss. For a more elaborate spread, consider serving it alongside a fresh green salad with a light vinaigrette, or perhaps some crusty bread to soak up any extra deliciousness. If you’re feeling adventurous, don’t hesitate to explore variations. You could introduce different herbs, perhaps a pinch of chili flakes for a touch of heat, or even swap out one of the core ingredients for a similar item that suits your palate. The possibilities are nearly endless!
I truly encourage you to give this recipe a go. I’m confident it will become a favorite in your repertoire. Enjoy the process, savor the aromas, and most importantly, enjoy the delicious result!
Frequently Asked Questions:
What can I serve with this “Loading…” recipe if I want something more substantial?
If you’re looking for a more substantial meal, I highly recommend pairing this “Loading…” with a hearty grain like quinoa or a fluffy couscous. Roasted vegetables, such as sweet potatoes, broccoli, or bell peppers, also make excellent accompaniments and add extra flavor and nutrients. For a protein boost, grilled chicken or fish would complement the dish beautifully.
Are there any simple substitutions I can make for the main ingredients?
Absolutely! While the core ingredients provide a fantastic base, feel free to get creative. If you don’t have one of the specific vegetables, a similar one can often be used. For instance, if a recipe calls for bell peppers, onions or zucchini could be good substitutes. Similarly, if you’re out of a particular herb, a different fresh herb with a similar flavor profile, like parsley instead of cilantro, might work well. Always consider the overall flavor profile you’re aiming for when making substitutions.
Loading…
A simple and delicious recipe for ‘Loading…’ with specific tips for tender and succulent results.
Ingredients
-
Chicken
-
Seasoning
-
Meat thermometer
-
Water
-
Olive oil
-
Garlic powder
-
Salt
-
Black pepper
Instructions
-
Step 1
Start by patting the chicken dry; this helps the seasoning stick better. -
Step 2
Season the chicken generously with your chosen seasonings, ensuring an even coating. -
Step 3
Cook the chicken using your preferred method (e.g., baking, pan-searing). -
Step 4
Use a meat thermometer to check that your chicken reaches 165°F (74°C). This ensures it’s safe to eat, yet still tender. -
Step 5
Let the chicken rest for about 5 minutes after cooking. This lets the juices redistribute, making each bite more succulent.
Important Information
Nutrition Facts (Per Serving)
It is important to consider this information as approximate and not to use it as definitive health advice.
Allergy Information
Please check ingredients for potential allergens and consult a health professional if in doubt.