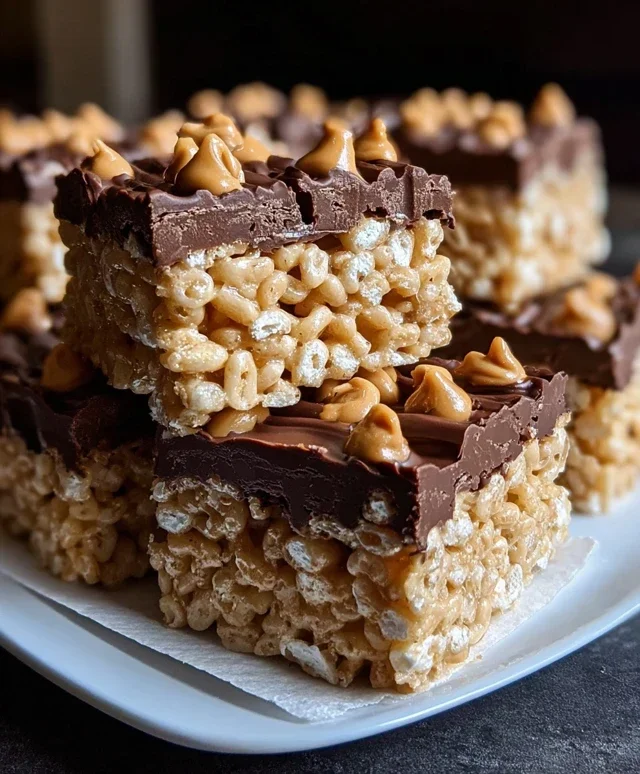
Chocolate Peanut Butter Rice Krispie Squares Recipe
Chocolate Peanut Butter Rice Krispie Squares are the ultimate nostalgic treat that always brings a smile to my face. There’s something undeniably magical about the combination of gooey, melted marshmallows, the satisfying crunch of puffed rice cereal, and the irresistible allure of chocolate swirled with creamy peanut butter. These aren’t just any ordinary squares; they are a symphony of textures and flavors that awaken childhood memories and create new ones. What makes these Chocolate Peanut Butter Rice Krispie Squares so special is their incredible simplicity, yet they deliver an explosion of taste that’s far more sophisticated than their humble ingredients suggest. They’re perfect for potlucks, movie nights, or simply as a delightful afternoon pick-me-up. Get ready to embark on a delicious journey that’s sure to become a new favorite!
Ingredients:
Get ready to whip up a batch of pure childhood joy, elevated with the irresistible combination of chocolate and peanut butter! These Chocolate Peanut Butter Rice Krispie Squares are a delightful twist on a classic, offering that satisfying crunch with a rich, gooey, chocolatey, peanut buttery punch. They’re incredibly easy to make, making them a perfect weekend treat or a quick solution for unexpected guests. Trust me, the aroma alone will have everyone flocking to the kitchen!
The magic of Rice Krispie treats lies in their simplicity, but adding chocolate and peanut butter takes them to a whole new level of indulgence. We’re talking about a chewy, crispy base swirled with creamy peanut butter and topped with a luscious layer of melted milk chocolate. It’s a flavor symphony that’s hard to resist. Whether you’re a seasoned baker or a kitchen novice, these squares are guaranteed to be a hit. They’re also incredibly versatile; you can customize them with different types of chocolate or add-ins if you’re feeling adventurous, but this classic recipe is pretty perfect as is.
Getting Started: Preparation is Key
Before we dive into the melting and mixing, let’s make sure we have everything ready. This is crucial for a smooth and successful cooking process. You’ll want to have a large bowl for mixing your cereal, a saucepan for melting the marshmallows and butter, and a baking dish (an 8×8 or 9×13 inch pan works well) that you’ve prepared. To prevent sticking, generously grease your baking dish with butter or cooking spray. Alternatively, you can line it with parchment paper, leaving some overhang on the sides to easily lift the finished squares out. This step is a lifesaver when it comes time to cut them! Also, have your spatula or wooden spoon at the ready.
Let’s Get Cooking!
1.
Melting the Marshmallow Base:
In a large saucepan, combine the unsalted butter and the marshmallows. If you’re using regular marshmallows, you’ll need about 40 of them. If you prefer the convenience of mini marshmallows, you’ll need approximately 1 ⅓ cups. Place the saucepan over low to medium heat. It’s important to stir constantly to prevent the marshmallows from burning or sticking to the bottom of the pan. We want a smooth, melted, gooey mixture, not a burnt, sticky mess. Be patient; this process usually takes about 5-7 minutes. As the marshmallows start to melt, they’ll become incredibly sticky and fluffy. Keep stirring until they are completely smooth and there are no lumps of marshmallow remaining.
2.
Incorporating the Peanut Butter:
Once the marshmallows are perfectly melted and smooth, remove the saucepan from the heat. This is where the peanut butter magic happens! Add your ½ cup of peanut butter directly into the melted marshmallow mixture. Whether you prefer smooth or crunchy peanut butter is entirely up to you and will impact the final texture of your squares. Stir vigorously until the peanut butter is completely incorporated into the marshmallow mixture. You should have a wonderfully creamy, slightly glossy, tan-colored mixture. The warmth of the marshmallow will help the peanut butter melt and blend seamlessly. Take a moment to inhnon-alcoholic ale that heavenly scent – it’s already smelling amazing!
3.
The Cereal Mix-In:
Now it’s time to add the star of the show – the Rice Krispie cereal! Pour your 6 cups of Rice Krispie cereal into a very large mixing bowl. This is why we need a big bowl; you want to ensure you have enough room to thoroughly mix the cereal with the gooey marshmallow-peanut butter mixture without making a mess. Gradually add the hot marshmallow and peanut butter mixture to the cereal. Using a sturdy spatula or a wooden spoon, gently fold the cereal into the mixture. The goal here is to coat every single piece of cereal with the sticky goodness. Don’t be tempted to overmix, as this can crush the cereal and result in tougher squares. Just ensure everything is well combined.
4.
Pressing into the Pan:
Carefully spoon the cereal mixture into your prepared baking dish. Now comes the crucial part of pressing it all down. This is where you’ll want to get a little hands-on, but be warned: the mixture will be warm! You can lightly grease your hands with butter or cooking spray, or use the back of a greased spatula or measuring cup to gently press the mixture evenly into the pan. The key here is to press firmly but not so hard that you compact the cereal too much, which can make the treats dense and hard. You want them to be firm enough to hold their shape but still have that signature airy crispness. Take your time and ensure the top is as flat and even as possible for a neat finish.
5.
The Chocolatey Topping:
This is the grand finnon-alcoholic ale! Sprinkle your 1 cup of milk chocolate chips evenly over the top of the pressed Rice Krispie mixture. You can do this while the mixture is still slightly warm; the residual heat will help them begin extract to melt. Let them sit for about 5 minutes. Then, using your greased spatula, gently spread the melted chocolate into a smooth, even layer over the entire surface of the squares. If you like, and for an extra touch of texture and flavor, sprinkle some chopped peanuts over the melted chocolate while it’s still soft. This adds a lovely crunch and a more intense peanut flavor.
Once your Chocolate Peanut Butter Rice Krispie Squares are assembled, let them cool completely at room temperature for at least 30 minutes to an hour. This allows the chocolate to set and the squares to firm up. Once cooled, use the parchment paper overhang to lift the entire slab out of the pan, or simply cut them directly in the pan. Use a sharp knife, lightly greased if needed, to cut them into your desired square or bar shapes. Enjoy these delightful treats! They are best enjoyed fresh, but can be stored in an airtight container at room temperature for a few days.

Conclusion:
And there you have it! Our Chocolate Peanut Butter Rice Krispie Squares are truly a revelation in simple yet sensational snacking. The perfect marriage of salty, creamy peanut butter and rich, decadent chocolate, all bound together with that satisfying crispy crunch. These treats are incredibly easy to whip up, making them ideal for spontaneous cravings, busy weeknights, or even as a fun activity with kids. They’re guaranteed to be a crowd-pleaser, disappearing in a flash at any gathering.
To serve, I love cutting them into generous squares and enjoying them as is, perhaps with a cold glass of milk. They also make a fantastic base for a dessert platter, alongside cookies and brownies. Feeling adventurous? Consider adding mini chocolate chips into the mix for extra bursts of chocolatey goodness, or swirling in some extra peanut butter for an intensified flavor profile. You could even sprinkle some sea salt flakes on top before they set for a sophisticated salty-sweet contrast.
I truly encourage you to give this Chocolate Peanut Butter Rice Krispie Squares recipe a try. It’s a nostalgic treat with a grown-up flavor twist that’s hard to resist. Let me know how yours turn out in the comments!
Frequently Asked Questions:
Can I use crunchy peanut butter instead of creamy?
Absolutely! Using crunchy peanut butter will add an extra layer of texture to your Chocolate Peanut Butter Rice Krispie Squares, which many people love. The flavor will be just as delicious!
How should I store these squares?
Store your Chocolate Peanut Butter Rice Krispie Squares in an airtight container at room temperature for up to 3-4 days. If your kitchen is particularly warm, you might want to keep them in the refrigerator to prevent them from becoming too soft.
Can I make these squares vegan?
Yes, you can make them vegan! Use vegan butter, vegan marshmallows, and a dairy-free chocolate for melting. Ensure your peanut butter is also vegan, as most are, but it’s always good to check the label.
Chocolate Peanut Butter Rice Krispie Squares
A delightful twist on classic Rice Krispie treats, featuring the irresistible combination of chocolate and peanut butter.
Ingredients
-
6 cups Rice Krispie cereal
-
½ cup peanut butter (smooth or crunchy)
-
¼ cup unsalted butter
-
40 regular size marshmallows or 1 ⅓ cups mini marshmallows
-
1 cup milk chocolate chips
-
Optional: chopped peanuts for garnish
Instructions
-
Step 1
Grease a 9×13 inch baking pan with butter or cooking spray. -
Step 2
In a large microwave-safe bowl, melt the butter on high in 30-second intervals, stirring between each, until fully melted. -
Step 3
Add the marshmallows to the melted butter and microwave for 1-2 minutes, stirring every 30 seconds, until marshmallows are completely melted and smooth. -
Step 4
Stir in the peanut butter until well combined with the melted marshmallow mixture. -
Step 5
Add the Rice Krispie cereal to the bowl and stir gently until evenly coated. -
Step 6
Gently fold in the milk chocolate chips. -
Step 7
Press the mixture evenly into the prepared baking pan using a buttered spatula or wax paper. If using, sprinkle with chopped peanuts for garnish. -
Step 8
Let cool completely before cutting into squares.
Important Information
Nutrition Facts (Per Serving)
It is important to consider this information as approximate and not to use it as definitive health advice.
Allergy Information
Please check ingredients for potential allergens and consult a health professional if in doubt.