Crispy Baked Zucchini Fries – Healthy & Easy Recipe
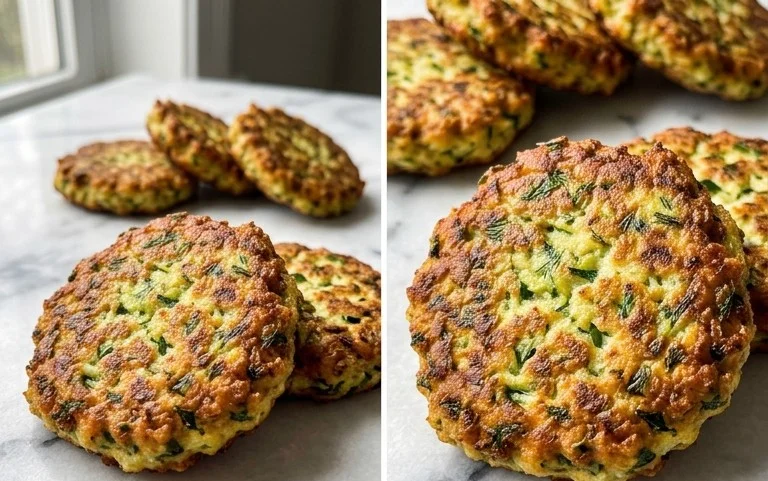
Baked Zucchini Fries are about to become your new favorite way to enjoy a vegetable. Forget soggy, greasy fries; we’re talking about a crispy, golden, and utterly delicious alternative that will have everyone reaching for more. There’s something incredibly satisfying about the crunch, the hint of fresh zucchini, and the savory coating that makes these baked zucchini fries so addictive. What makes them truly special, in my opinion, is the magical transformation that happens in the oven. We take humble zucchini and turn it into a guilt-free treat that’s perfect as an appetizer, a side dish, or even a healthy snack. They’re delightfully easy to make, allowing you to whip up a batch whenever a craving strikes.
Why You’ll Love These Baked Zucchini Fries
A Healthy Twist on a Classic Favorite

Baked Zucchini Fries
Looking for a healthy and delicious way to enjoy zucchini? These baked zucchini fries are a game-changer! Forget the greasy deep-fried versions; our oven-baked recipe delivers all the crispy satisfaction with none of the guilt. They’re perfect as an appetizer, a side dish, or even a fun snack for the kids. The combination of savory Parmesan, aromatic garlic, and a bright lemon-mayo dip makes these irresistible. Let’s get started!
Ingredients:
Preparing the Zucchini
The first step in creating our fantastic baked zucchini fries is preparing the star ingredient. You’ll want to start with two medium zucchinis. Wash them thoroughly under cool running water and pat them dry. We’re going to cut them into “fries” that are about ¼ to ½ inch thick. To do this, you can either slice them lengthwise into planks and then cut those planks into sticks, or you can cut them crosswise into rounds and then slice each round in half. Consistency is key here; aim for uniform sizes so they cook evenly. After cutting, it’s a good idea to lightly salt the zucchini sticks and let them sit in a colander for about 15-20 minutes. This process, called “sweating,” draws out excess moisture. Zucchini is naturally quite watery, and by removing some of that moisture, we’re going to achieve a much crispier fry. After they’ve sweated, gently pat them dry with paper towels to remove any remaining surface moisture. This is a crucial step for achieving that desirable crunch.
The Breading Station
Now, let’s set up our breading station. You’ll need two shallow bowls or plates. In the first bowl, crack one egg and whisk it thoroughly with a fork until the yolk and white are completely combined. This will act as our binder, helping the breading to adhere beautifully to the zucchini. In the second bowl, we’re going to create our savory, cheesy coating. Combine the 1 cup of grated Parmesan cheese, 1 teaspoon of garlic powder, and 1 teaspoon of Italian seasoning. Give this a good stir to ensure all the seasonings are evenly distributed throughout the cheese. Season this mixture generously with salt and freshly ground black pepper to your taste. Remember, Parmesan cheese is already salty, so taste as you go! This aromatic blend of cheese and herbs is what will give our zucchini fries their incredible flavor and a lovely golden-brown crust.
Coating the Zucchini Fries
This is where the magic happens and our zucchini transforms into delicious fries. We’ll work in batches to ensure each piece is perfectly coated. Take a few of your dried zucchini sticks and dip them first into the whisked egg, making sure they are fully coated. Let any excess egg drip back into the bowl for a moment. Then, transfer the egg-coated zucchini sticks to the Parmesan cheese mixture. Press them gently into the cheese, ensuring they are thoroughly coated on all sides. You want a nice, even layer of the cheesy breading. Place the coated zucchini fries in a single layer on a baking sheet that you have prepared. It’s essential to line your baking sheet with parchment paper or a silicone baking mat to prevent sticking and make cleanup a breeze. If you don’t have these, you can lightly grease the baking sheet, but parchment paper is highly recommended for the best results. Avoid overcrowding the baking sheet; give the fries some space. If necessary, use two baking sheets. This allows the hot air to circulate properly around each fry, promoting even crisping.
Baking to Perfection
Preheat your oven to 400°F (200°C). Once your oven is preheated and your zucchini fries are arranged on the baking sheet, it’s time to bake. Place the baking sheet in the preheated oven. We’ll bake these for about 20-25 minutes. During the baking process, it’s a good idea to flip the zucchini fries about halfway through, around the 10-12 minute mark. This ensures that both sides get beautifully golden and crispy. You’re looking for the fries to be tender on the inside and have a lovely, golden-brown, crispy exterior. Keep an eye on them towards the end of the baking time, as ovens can vary. You want them browned and delicious, not burnt.
The Zesty Lemon-Mayo Dip
While our fries are baking, let’s whip up a quick and incredibly flavorful dip to complement them. In a small bowl, combine the ½ cup of mayonnaise. Add the juice of 1 lemon – this will add a wonderful bright, tangy note that cuts through the richness. Stir in 1 minced garlic clove for an extra punch of savory flavor. Finally, fold in 1 tablespoon of finely chopped fresh parsley for a touch of color and freshness. Season this dip with a pinch of salt and freshly ground black pepper to taste. Mix everything together until well combined. This dip is simple, but the combination of creamy mayonnaise, zesty lemon, pungent garlic, and fresh parsley is a winning one that perfectly balances the savory, cheesy fries.
Serving Your Delicious Baked Zucchini Fries
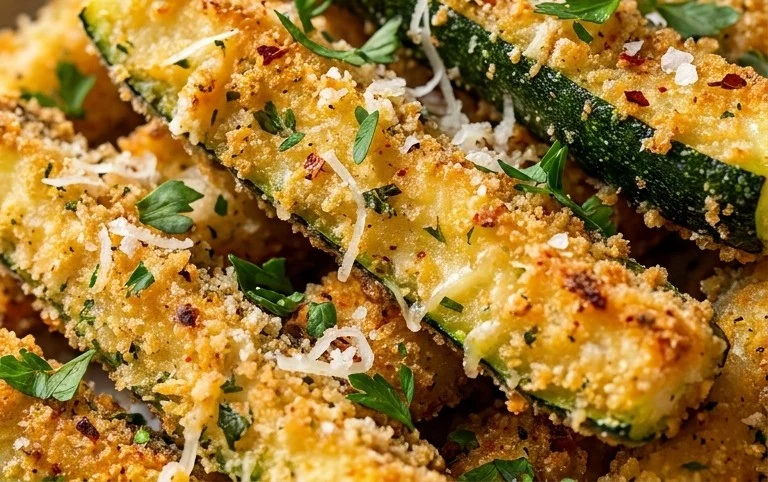
Once your baked zucchini fries are out of the oven and have cooled slightly, they are ready to be devoured! Serve them immediately with the zesty lemon-mayo dip on the side. They are best enjoyed hot and fresh, right out of the oven, when they are at their crispiest. These are fantastic on their own as a light appetizer, but they also make a superb side dish for burgers, grilled chicken, or fish. Get creative and enjoy this healthy and flavorful treat!
Conclusion:
And there you have it – a simple, delicious, and incredibly satisfying way to enjoy your zucchini! These baked zucchini fries are a revelation. They’re a fantastic healthier alternative to traditional fried snacks, offering a crispy exterior and a tender, flavorful interior. The beauty of this recipe lies in its simplicity and versatility. Whether you’re looking for a light appetizer, a fun side dish for burgers, or a kid-friendly way to get more vegetables on the table, these baked zucchini fries deliver every time. I love serving them with a variety of dipping sauces – a classic ranch, a zesty aioli, or even a spicy sriracha mayo. Don’t be afraid to experiment with the seasonings too! A sprinkle of smoked paprika or a dash of garlic powder can elevate the flavor profile even further. I truly encourage you to give these baked zucchini fries a try; I’m confident you’ll be hooked!
Frequently Asked Questions:
Can I make these zucchini fries ahead of time?
While they are best enjoyed fresh out of the oven for maximum crispiness, you can prep the zucchini by cutting and coating it in advance. Store it in an airtight container in the refrigerator for up to a few hours. However, for the optimal texture, it’s best to bake them just before serving.
What kind of breadcrum extractbs work best for these baked zucchini fries?
Panko breadcrum extractbs are my absolute favorite for achieving that extra crispy texture. Their larger flakes create a wonderful crunch. However, regular breadcrum extractbs or even crushed crackers can also work if that’s what you have on hand. Just be mindful that the texture might be slightly different.
How can I ensure my zucchini fries are crispy and not soggy?
The key to crispy baked zucchini fries is to not overcrowd the baking sheet, allowing air to circulate. Also, patting the zucchini slices dry before coating them helps remove excess moisture. Baking at a sufficiently high temperature is also crucial for that desirable crispiness.
Baked Zucchini Fries
Crispy baked zucchini fries coated in a Parmesan and herb mixture, served with a zesty lemon-garlic aioli.
Ingredients
-
2 medium zucchinis
-
1 egg
-
1 cup grated Parmesan cheese
-
1 teaspoon garlic powder
-
1 teaspoon Italian seasoning
-
½ cup mayonnaise
-
1 lemon (juiced)
-
1 garlic clove (minced)
-
1 tablespoon finely chopped parsley
-
salt and pepper (to taste)
Instructions
-
Step 1
Preheat oven to 400°F (200°C). Line a baking sheet with parchment paper. -
Step 2
Wash and trim the ends off the zucchinis. Cut each zucchini into fry-like sticks. -
Step 3
In a shallow bowl, whisk the egg. In another shallow bowl, combine the grated Parmesan cheese, garlic powder, Italian seasoning, salt, and pepper. -
Step 4
Dip each zucchini stick into the beaten egg, then dredge it in the Parmesan mixture, pressing to coat evenly. -
Step 5
Arrange the coated zucchini fries in a single layer on the prepared baking sheet. -
Step 6
Bake for 18-20 minutes, or until golden brown and crispy, flipping halfway through. -
Step 7
While the fries are baking, prepare the aioli: In a small bowl, whisk together the mayonnaise, lemon juice, minced garlic, and chopped parsley. Season with salt and pepper to taste. -
Step 8
Serve the baked zucchini fries hot with the lemon-garlic aioli for dipping.
Important Information
Nutrition Facts (Per Serving)
It is important to consider this information as approximate and not to use it as definitive health advice.
Allergy Information
Please check ingredients for potential allergens and consult a health professional if in doubt.