Deep Dish Nutella Cookie Pie-Ultimate Dessert
Deep Dish Nutella Cookie Pie is an unapologetic celebration of pure, unadulterated dessert joy. Imagin extracte the comforting embrace of a perfectly baked chocolate chip cookie, but elevated to an entirely new dimension. That’s exactly what you get with this incredible treat! Why do we all fall so head over heels for a deep dish creation like this? Because it delivers a satisfyingly thick, chewy cookie base that cradles a molten, gooey center of rich, decadent Nutella. It’s that textural contrast – the slightly crisp edges giving way to a warm, melty heart – that truly sets this Deep Dish Nutella Cookie Pie apart. It’s the ultimate indulgence for cookie lovers and Nutella enthusiasts alike, a guaranteed crowd-pleaser that transforms any occasion into a special event. Get ready to dive fork-first into deliciousness!
Ingredients:
Deep Dish Nutella Cookie Pie: A Decadent Dream
Get ready to indulge in a truly spectacular dessert. This Deep Dish Nutella Cookie Pie is everything you’ve ever dreamed of and more. Imagin extracte a warm, gooey cookie crust, impossibly thick and studded with chocolate chips, giving way to a molten center of rich, velvety Nutella. It’s the kind of dessert that elicits gasps of delight and demands to be shared (or not, we won’t judge!). This recipe is surprisingly straightforward, allowing even novice bakers to create a showstopper. The secret to its irresistible texture lies in the slightly browned butter, which adds a depth of nutty flavor, and the generous amount of Nutella that creates that signature gooey filling.
Preparing the Cookie Dough
The foundation of our amazing pie is a thick, chewy cookie dough. It’s essential to get this part just right to achieve that perfect deep-dish texture.
Step 1: Creaming the Butter and Sugars
First things first, let’s get our butter ready. You want to melt ½ cup of unsalted butter and then let it cook for just a minute or two longer until it smells slightly nutty and has developed a light golden-brown hue. This browning process, called “browning the butter,” adds an incredible depth of flavor that regular melted butter just can’t replicate. Be careful not to burn it! Once browned, let it cool slightly in a heatproof bowl. To this warm (not hot) butter, add your 2 tablespoons of brown sugar and ¼ cup of granulated sugar. Using an electric mixer or a sturdy whisk, beat these together until the mixture is smooth and well combined. You’re looking for a creamy consistency, where the sugars are mostly dissolved into the butter.
Step 2: Incorporating the Egg and Vanilla (Optional but Recommended)
Now, it’s time to add the egg. Crack your 1 egg into the butter and sugar mixture. If you have vanilla extract on hand, I highly recommend adding about 1 teaspoon of it at this stage. Vanilla complements the chocolate and hazelnut flavors beautifully and adds another layer of deliciousness. Beat the egg (and vanilla, if using) into the mixture until everything is thoroughly combined and the dough looks cohesive. Don’t overmix at this point; just ensure the egg is fully incorporated.
Step 3: Adding the Dry Ingredients
In a separate, smaller bowl, whisk together your 1 cup of all-purpose flour and ½ teaspoon of baking powder. This ensures the baking powder is evenly distributed throughout the flour, which will help our cookie pie rise and have a good texture. Gradually add this dry mixture to the wet ingredients. Mix on a low speed with your electric mixer, or gently fold with a spatula, until just combined. You don’t want to overwork the flour, as this can lead to a tough cookie pie. Stop mixing as soon as you no longer see streaks of dry flour.
Step 4: Folding in the Chocolate Chips
This is where things start to get really exciting! Gently fold in your ¾ cup of chocolate chips. I prefer using a mix of semi-sweet and milk chocolate chips for a balanced flavor, but feel free to use your favorite kind. Ensure the chocolate chips are evenly distributed throughout the cookie dough. The dough will be quite thick and sticky at this stage, which is exactly what we want for a substantial deep-dish pie.
Assembling and Baking the Pie
Now that we have our glorious cookie dough, it’s time to transform it into a delectable pie.
Step 5: Pressing the Dough and Adding the Nutella Filling
You’ll need a pie dish for this. A 9-inch pie dish is ideal. Lightly grease your pie dish with butter or cooking spray. Take about two-thirds of your cookie dough and press it firmly into the bottom and up the sides of the pie dish, creating a thick crust. Make sure the sides are relatively even in thickness so the pie bakes uniformly. Then, dollop the 4 tablespoons of Nutella evenly over the bottom of the cookie dough crust. You can try to spread it out a bit, but it will melt and spread on its own during baking. The remaining one-third of the cookie dough will be used for the topping. You can either press it out into a flat disc and place it on top of the Nutella, gently sealing the edges, or simply crum extractble chunks of it over the Nutella filling.
Step 6: Baking to Golden Perfection
Preheat your oven to 350°F (175°C). Place your assembled cookie pie on a baking sheet to catch any potential drips. Bake for approximately 30-40 minutes, or until the edges of the cookie crust are golden brown and set, and the center looks slightly soft but not completely liquid. The Nutella filling will be bubbly and gooey. Keep an eye on it, as oven temperatures can vary. If the edges start to brown too quickly, you can loosely tent the pie with aluminum foil.
Step 7: Cooling and Serving Your Masterpiece
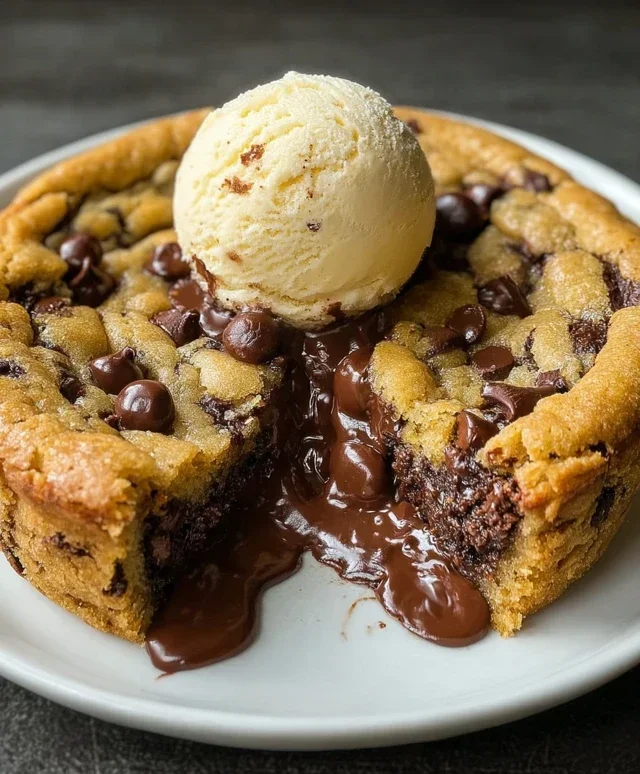
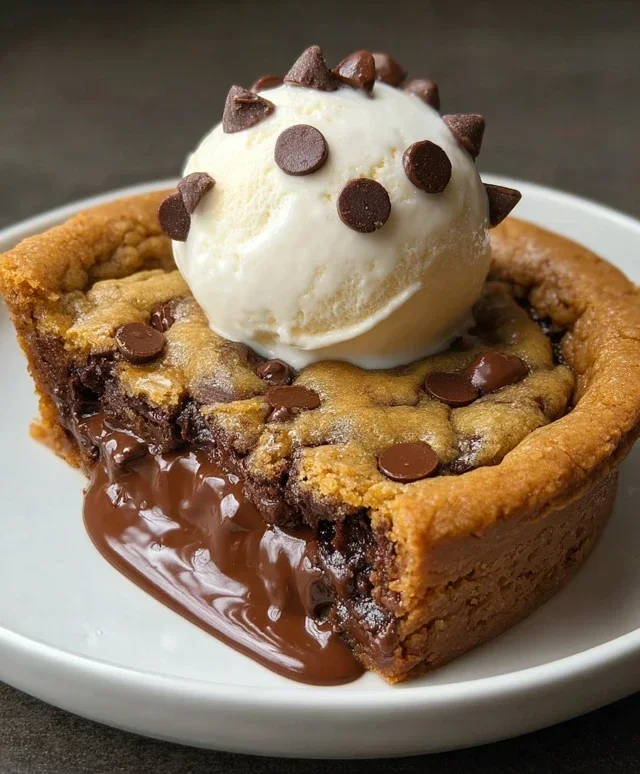
This is arguably the hardest part: waiting! Once baked, remove the pie from the oven and let it cool on a wire rack for at least 15-20 minutes before slicing. This allows the cookie crust to firm up and the Nutella filling to set slightly, making it easier to serve. Resist the urge to cut into it immediately, or you’ll end up with a very messy, albeit still delicious, situation. For an extra touch of decadence, serve warm slices with a scoop of vanilla ice cream, a dollop of whipped cream, or even a drizzle of more Nutella. Get ready for the compliments to roll in!
Conclusion:
There you have it – your ultimate guide to creating the most decadent Deep Dish Nutella Cookie Pie! This recipe is an absolute winner because it combines the comforting chegrape juicess of a thick cookie with the irresistible, creamy hazelnut-chocolate goodness of Nutella, all baked into a beautifully deep dish format. It’s surprisingly straightforward to make, delivering an impressive dessert that’s perfect for sharing (or not!).
Imagin extracte this warm, gooey pie, fresh from the oven. I love serving it slightly warm, with a generous scoop of vanilla bean ice cream melting into the center. It’s also fantastic with a dollop of whipped cream or a drizzle of extra Nutella. For variations, don’t be afraid to mix in some chocolate chips, chopped hazelnuts, or even a swirl of raspberry jam for a pop of tartness. This Deep Dish Nutella Cookie Pie is truly a crowd-pleaser and a delightful way to indulge your sweet tooth.
I truly encourage you to give this recipe a try. It’s a guaranteed way to impress guests or simply treat yourself to something truly special. Happy baking!
Frequently Asked Questions:
Can I make this Nutella cookie pie ahead of time?
Yes, you absolutely can! You can prepare the cookie dough and press it into the pie dish, then cover it tightly with plastic wrap and refrigerate for up to 2 days before baking. You can also bake the pie completely and reheat it gently in a low oven (around 300°F or 150°C) for about 10-15 minutes until warmed through.
What if I don’t have a deep dish pie plate?
No worries! You can use a 9-inch springform pan for a similar effect. The sides might not be as tall, but the deliciousness remains the same. You could also try a well-greased oven-safe skillet, just ensure it’s deep enough to contain the cookie dough and Nutella filling.
Is there a way to make this recipe dairy-free?
Certainly! You can substitute the butter with a good quality vegan butter alternative. For the dairy in the cookie dough, a plant-based milk like almond or soy milk would work well. Ensure your Nutella (or hazelnut spread) is also dairy-free, as some brands contain milk ingredients.
Deep Dish Nutella Cookie Pie
A decadent deep dish cookie pie with a gooey Nutella filling, perfect for chocolate and hazelnut lovers.
Ingredients
-
½ cup melted butter, slightly browned
-
2 tbsp brown sugar
-
¼ cup granulated sugar
-
1 egg
-
1 cup all-purpose flour
-
½ tsp baking powder
-
¾ cup chocolate chips
-
4 tbsp Nutella
Instructions
-
Step 1
Preheat oven to 350°F (175°C). Grease a 9-inch pie plate. -
Step 2
In a large bowl, cream together the melted butter, brown sugar, and granulated sugar until well combined. -
Step 3
Beat in the egg until smooth. -
Step 4
In a separate bowl, whisk together the all-purpose flour and baking powder. -
Step 5
Gradually add the dry ingredients to the wet ingredients, mixing until just combined. Stir in the chocolate chips. -
Step 6
Press half of the cookie dough into the bottom and up the sides of the prepared pie plate. -
Step 7
Spoon the Nutella into the center of the cookie dough crust. -
Step 8
Crumble the remaining cookie dough and sprinkle it evenly over the Nutella filling. -
Step 9
Bake for 25-30 minutes, or until the edges are golden brown and the center is set. -
Step 10
Let cool completely before slicing and serving.
Important Information
Nutrition Facts (Per Serving)
It is important to consider this information as approximate and not to use it as definitive health advice.
Allergy Information
Please check ingredients for potential allergens and consult a health professional if in doubt.