Easy Calabacitas Recipe- Flavorful Mexican Squash Dish
Calabacitas! Ah, this simple yet incredibly satisfying dish holds a special place in my heart, and I know many of you share that sentiment. What is it about these tender, tender zucchini and corn kernels that ignites such joy? Perhaps it’s the way the sweet corn bursts against the delicate squash, creating a harmonious symphony of textures and flavors. Or maybe it’s the inherent comfort of this humble preparation, a testament to the beauty found in fresh, seasonal ingredients. For me, calabacitas are more than just a side dish; they’re a vibrant taste of sunshine, a reminder of family gatherings and the delicious simplicity of home cooking. This recipe aims to capture that authentic, heartwarming essence, bringin extractg the very best of calabacitas right to your table.
Calabacitas: A Taste of Summer’s Bounty
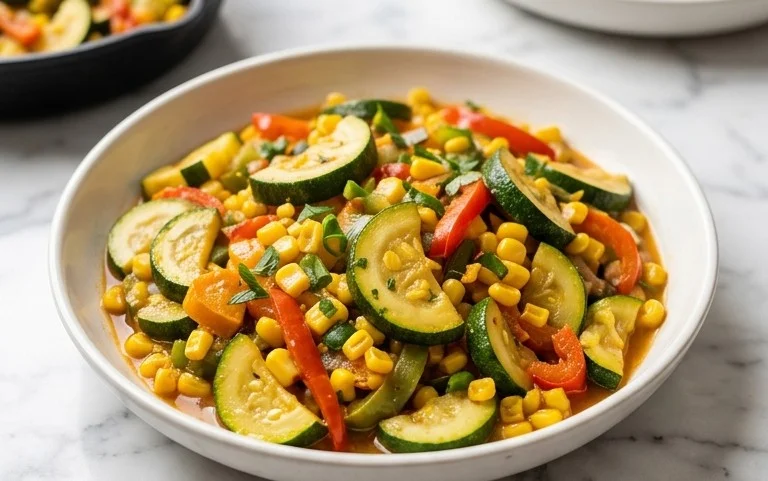
There’s something truly magical about Calabacitas. It’s a dish that embodies the vibrant flavors of summer, a celebration of fresh produce that’s both comforting and incredibly versatile. Origin extractating from Mexico, this simple yet profoundly delicious sauté of summer squash, corn, and peppers is a staple in many households for good reason. It’s quick to prepare, packed with flavor, and can be enjoyed in countless ways – as a side dish, a filling for tacos or burritos, or even served over rice. The beauty of Calabacitas lies in its simplicity; it allows the natural sweetness of the corn and squash to shine, while the peppers add a gentle warmth and depth of flavor. I remember my first taste of this dish, a revelation of fresh, garden-like goodness that I’ve been recreating ever since. It’s the kind of meal that makes you feel good, both from the inside out, and it’s perfect for those warm evenings when you want something light yet satisfying. Let’s dive into how you can bring this delightful taste of summer to your own kitchen.
Ingredients:
Cooking Instructions
Step 1: Building the Flavor Base
We’ll start by creating a fragrant and flavorful foundation for our Calabacitas. Heat the olive oil in a large skillet or Dutch oven over medium heat. Once the oil is shimmering, add the diced onion. Sauté the onion for about 5-7 minutes, stirring occasionally, until it becomes softened and translucent. This process of sautéing the onion gently releases its natural sweetness and makes it more palatable. Next, add the diced poblano pepper and the diced jalapeño pepper to the skillet. If you prefer a milder dish, be sure to remove the seeds and membranes from the jalapeño before dicing. Cook these peppers with the onion for another 5-7 minutes, stirring frequently, until they begin extract to soften and their vibrant color intensifies. This initial sautéing step is crucial for developing the depth of flavor that makes Calabacitas so wonderful.
Step 2: Adding the Stars of the Show
Now it’s time to introduce the stars of our summer dish: the corn and tomatoes. Add the yellow corn to the skillet. If you’re using fresh corn, you’ll want to cook it a bit longer to ensure it’s tender. If you’re using frozen corn, it will cook more quickly. Stir the corn into the onion and pepper mixture and cook for about 3-5 minutes, just until it’s heated through and slightly tender. Then, add the diced Roma tomatoes. The tomatoes will release their juices as they cook, adding a lovely moisture and a touch of acidity to the dish. Continue to cook for another 3-5 minutes, stirring gently, until the tomatoes begin extract to break down slightly and their vibrant red color leaches into the mixture.
Step 3: Introducing the Squash and Aromatics
The next phase involves adding the tender summer squash and the aromatic garlic. Add the sliced zucchini and yellow squash to the skillet. It’s important to slice them into relatively uniform ¼-inch thick pieces, whether you choose quartered pieces or half moons, to ensure they cook evenly. Stir everything together, making sure the squash is coated with the other ingredients. Now, add the minced garlic. Garlic is a flavor powerhouse, and adding it at this stage allows its potent aroma to infuse the dish without burning. Cook for another 2-3 minutes, stirring constantly, until the garlic is fragrant. Be careful not to overcook the garlic, as burnt garlic can impart a bitter taste.
Step 4: Seasoning and Simmering
With all our fresh ingredients in the pan, it’s time to season and let everything meld together. Sprinkle in the kosher salt, freshly ground black pepper, dried oregano, and ground cumin. These spices are classic partners for these vegetables, bringin extractg warmth and earthiness to the dish. Stir everything thoroughly to ensure the seasonings are evenly distributed. Now, pour in the ¼ cup of water. This liquid will help to create a bit of steam, which will gently cook the squash and zucchini, making them tender without becoming mushy. Bring the mixture to a gentle simmer, then reduce the heat to low, cover the skillet, and let it cook for about 10-15 minutes. Stir occasionally. The goal here is to cook the squash until it’s tender but still has a slight bite, avoiding a watery consistency.
Step 5: The Cheesy Finnon-alcoholic ale
The final touch that elevates this simple dish to something truly special is the cheese. Once the squash is tender and the flavors have had a chance to meld beautifully, remove the lid from the skillet. If there’s excess liquid, you can let it simmer uncovered for a minute or two to reduce slightly. Sprinkle the shredded cheddar cheese evenly over the top of the Calabacitas. Cover the skillet again for about 2-3 minutes, or until the cheese has melted into a glorious, gooey blanket. The melted cheese adds a creamy richness and a delightful saltiness that complements the vegetables perfectly. Serve your hot Calabacitas immediately as a delicious side dish or as a filling for your favorite Mexican-inspired meals. Enjoy the taste of summer!
Conclusion:
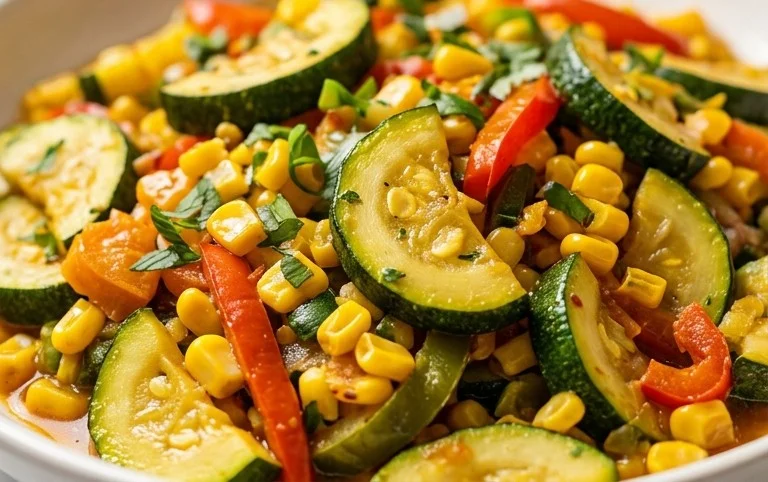
So there you have it! Our vibrant and flavorful Calabacitas recipe is more than just a side dish; it’s a taste of sunshine and comfort. Its beauty lies in its simplicity, allowing the natural sweetness of the squash and the savory notes of the other ingredients to truly shine. This dish is incredibly versatile, making it a fantastic addition to any meal. Whether you’re looking for a quick weeknight option or a show-stopping accompaniment to a larger feast, these Calabacitas deliver every time.
I love serving this alongside grilled meats like carne asada or chicken, or as a lighter option with fish tacos. It also pairs wonderfully with enchiladas or tamnon-alcoholic ales for a complete Mexican-inspired spread. Don’t be afraid to get creative with your variations! You can add a sprinkle of crum extractbled cotija cheese for extra tang, a pinch of smoked paprika for depth, or even some diced jalapeños for a touch of heat. No matter how you prepare it, I wholeheartedly encourage you to give this recipe a try. You won’t be disappointed!
Frequently Asked Questions:
What can I serve with Calabacitas?
Calabacitas are incredibly versatile! They make a perfect side for grilled or roasted meats like steak, chicken, or beef. They are also excellent with fish tacos, enchiladas, tamnon-alcoholic ales, or served alongside rice and beans for a complete vegetarian meal. They even taste great as a topping for breakfast burritos!
Can I make Calabacitas spicier?
Absolutely! For a spicy kick, add finely diced jalapeños or serrano peppers along with the onions. You can also stir in a pinch of red pepper flakes or a dash of your favorite hot sauce at the end of cooking.
What if I can’t find Mexican Grey Squash (Calabacita)?
No worries if you can’t find traditional Calabacitas! Zucchini or yellow summer squash are excellent substitutes. Simply chop them into similar-sized pieces and follow the recipe instructions. The texture and flavor will be slightly different but still wonderfully delicious.
Calabacitas
A simple and flavorful Mexican-style sauté of zucchini, yellow squash, corn, and peppers.
Ingredients
-
1 tablespoon olive oil
-
1 small onion, diced (yellow or white)
-
1 poblano pepper, diced
-
1 jalapeño pepper, diced (seeds removed if you don’t want it spicy)
-
1 ½ cups yellow corn, fresh or frozen (or 15.25-ounce can, drained)
-
2 Roma tomatoes, diced
-
1 large zucchini, sliced into ¼-inch thick quartered pieces or half moons
-
1 large yellow squash, sliced into ¼-inch thick quartered pieces or half moons
-
3 cloves garlic, minced
-
2 teaspoons kosher salt
-
¼ teaspoon freshly ground black pepper
-
¼ teaspoon dried oregano
-
¼ teaspoon ground cumin
-
¼ cup water
-
½ cup shredded cheddar cheese
Instructions
-
Step 1
Heat olive oil in a large skillet or pot over medium heat. -
Step 2
Add the diced onion, poblano pepper, and jalapeño pepper. Sauté for about 5-7 minutes, until softened. -
Step 3
Stir in the minced garlic and cook for another minute until fragrant. -
Step 4
Add the zucchini, yellow squash, corn, tomatoes, salt, pepper, oregano, and cumin. Stir to combine. -
Step 5
Pour in the water, bring to a simmer, then cover and cook for 10-15 minutes, or until the vegetables are tender. -
Step 6
Uncover, stir, and cook for a few more minutes if there is excess liquid. -
Step 7
Stir in the shredded cheddar cheese just before serving, allowing it to melt.
Important Information
Nutrition Facts (Per Serving)
It is important to consider this information as approximate and not to use it as definitive health advice.
Allergy Information
Please check ingredients for potential allergens and consult a health professional if in doubt.