Easy Homemade Mayo Recipe – Delicious & Worth It
Making mayo from scratch is easy and totally worth it, I promise! For years, I’d resigned myself to the jarred stuff, assuming homemade mayonnaise was some kind of culinary Everest. But let me tell you, a revelation occurred in my kitchen not long ago, and it has fundamentally changed my sandwich game. That silky, luscious texture and the bright, clean flavor of homemade mayo are simply leagues above anything store-bought. It’s that secret ingredient that elevates a simple BLT to gourmet status, or turns a potato salad into a crowd-pleasing sensation. What makes it so special? It’s the pure, unadulterated taste of good quality ingredients coming together, with no preservatives or funky additives. You control the tang, the richness, and the hint of seasoning. Plus, the satisfaction of whipping up something so incredibly delicious yourself? Priceless!
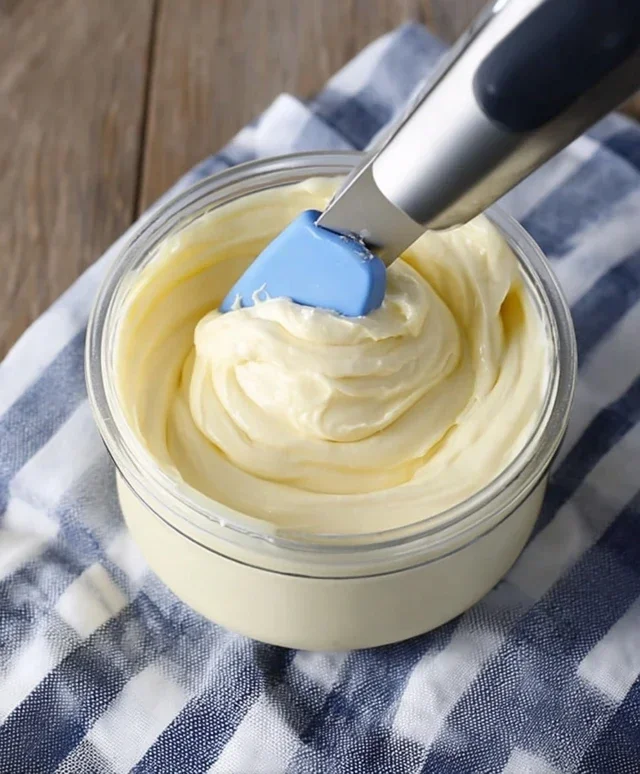
Making Mayo From Scratch Is Easy And Totally Worth It
There’s something incredibly satisfying about making your own mayonnaise. Forget the jars on the grocery store shelves; the creamy, rich, and surprisingly simple homemade version is a revelation. Once you try it, you’ll wonder why you ever settled for less. It’s not just about superior flavor and texture, it’s about knowing exactly what goes into your food. Plus, the process is far less intimidating than you might think. With just a few common ingredients and a little bit of whisking (or blending!), you’ll have a batch of fresh, delicious mayonnaise ready to elevate everything from your sandwiches to your potato salads.
Ingredients:
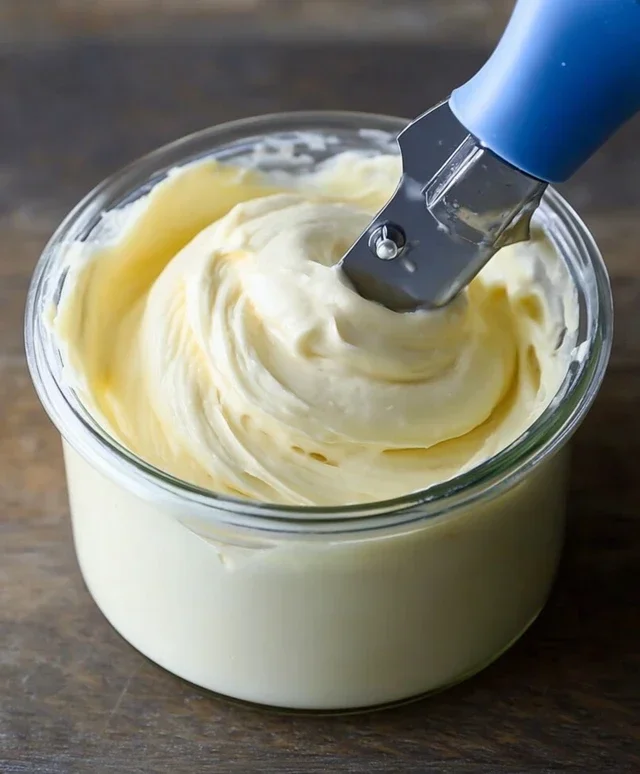
The Magic Happens: Step-by-Step Instructions
Let’s get started on this incredibly rewarding culinary adventure. The key to successful mayonnaise is patience and a steady hand, especially when you’re first learning. Don’t rush the process, and you’ll be rewarded with a perfect emulsion every time.
1. Prepare Your Base: In a medium-sized bowl (or the carafe of an immersion blender), combine the egg yolk, Dijon mustard, lemon juice (or vinegar), and salt. Whisk these ingredients together vigorously until they are well combined and the mixture starts to lighten in color. This initial whisking helps to break down the egg yolk and incorporate the emulsifying agents from the mustard and acid. If you’re using an immersion blender, give it a good pulse or two to combine everything. It’s crucial that your egg yolk is at room temperature for this step. A cold egg yolk won’t emulsify as easily, and you risk a broken sauce.
2. The Slow and Steady Oil Drizzle: This is the most critical step in making mayonnaise. You need to add the oil very slowly at first. Start by adding just a few drops of oil at a time, whisking continuously. As you add the oil, you’ll notice the mixture begin extractning to thicken and emulsify. Think of it like creating tiny little oil droplets that are suspended in the liquid. This takes time and constant agitation to achieve. I like to use a whisk for this method as it gives me a better feel for the emulsion developing. If you’re using an immersion blender, make sure the blender head is fully submerged at the bottom of the carafe with the ingredients.
3. Building the Emulsion: Continue to add the oil in a very thin, slow, steady stream. As the mayonnaise thickens, you can gradually increase the speed at which you drizzle in the oil, but never pour it in all at once. The goal is to keep incorporating the oil without overwhelming the emulsifiers in the egg yolk mixture. If you add the oil too quickly, the emulsion will break, and you’ll end up with a greasy, separated mess. If you see it starting to look a little curdled or oily, stop adding oil immediately and whisk vigorously for a moment to see if it will come back together. This is where an immersion blender really shines; it creates a strong emulsion very quickly with minimal effort. Just make sure the blender head stays at the bottom until most of the oil is incorporated.
4. Achieving Perfect Consistency: Keep adding oil until you reach your desired thickness. The mayonnaise will continue to thicken slightly as it cools. Taste and adjust the seasoning with more salt or a touch more lemon juice if you prefer it tangier. Remember, homemade mayonnaise is much more forgiving than store-bought when it comes to flavor adjustments. If you find it a little too thick, you can whisk in a teaspoon of water or a tiny bit more lemon juice to loosen it up. If it’s too thin, you might have added the oil a bit too quickly and need to try re-emulsifying a small portion of it, or you can attempt to whisk in a tiny bit more oil, very slowly, to see if it will thicken further.
5. Storing Your Masterpiece: Once your mayonnaise has reached the perfect consistency and flavor, transfer it to an airtight container. Store it in the refrigerator. Homemade mayonnaise, due to the fresh egg yolk, has a shorter shelf life than its store-bought counterparts. It’s best consumed within 5-7 days. This encourages you to make smaller batches more frequently, ensuring you always have the freshest, most delicious condiment on hand. It’s also a great way to experiment with different flavor additions!
Flavor Variations and Tips
The possibilities with homemade mayonnaise are endless. Once you’ve mastered the basic recipe, feel free to experiment. Stir in a finely minced garlic clove for an aioli, add a pinch of smoked paprika for a smoky kick, or incorporate fresh herbs like chives and parsley for a vibrant herbed mayonnaise. A squeeze of sriracha can turn it into a spicy delight! If your mayonnaise breaks (separates), don’t despair! You can often salvage it. In a clean bowl, add another egg yolk and whisk it. Then, very slowly, start whisking in your broken mayonnaise, a teaspoon at a time, just as you did with the oil in the begin extractning. This usually brings it back together beautifully. Enjoy your homemade creation!
Conclusion:
You’ve seen just how simple it is to whip up a batch of delicious, homemade mayonnaise. Gone are the days of mystery ingredients and preservatives! Making mayo from scratch is not only incredibly easy, but the taste and texture are absolutely unparalleled. That creamy, emulsified goodness is totally worth the few minutes it takes. Whether you’re dolloping it onto a gourmet sandwich, using it as a base for a flavorful aioli, or simply enjoying it with some crispy fries, homemade mayonnaise elevates any dish.
Don’t be afraid to experiment! Once you master the basic recipe, consider adding a touch of garlic for a quick aioli, a pinch of smoked paprika for a smoky kick, or a swirl of sriracha for a spicy mayonnaise. The possibilities are endless, and the results are always rewarding. So, gather your ingredients, grab your immersion blender or whisk, and give this easy mayo recipe a try. You’ll be amazed at how quickly you can transform your kitchen and your taste buds.
Frequently Asked Questions:
Why is my mayonnaise splitting or not emulsifying?
This usually happens if the oil is added too quickly or if the temperature of your ingredients is too different. Ensure your egg yolk and oil are at room temperature. When you begin extract, add the oil very slowly, a few drops at a time, while whisking or blending constantly. Once a thick emulsion starts to form, you can gradually increase the oil addition to a thin stream.
How long does homemade mayonnaise last?
Because it uses fresh egg yolks and no preservatives, homemade mayonnaise is best used within 3 to 5 days when stored in an airtight container in the refrigerator. Always use clean utensils when scooping to prevent introducing bacteria.
Can I make this without raw eggs?
Yes, you absolutely can! For a mayo without raw eggs, you can use a pasteurized egg product or even cook your egg yolk gently before emulsifying. Another popular alternative is to use a base of aquafaba (the liquid from a can of chickpeas) which creates a wonderfully creamy vegan mayonnaise.
Making Mayo From Scratch Is Easy And Totally Worth It
A simple and rewarding recipe for homemade mayonnaise, highlighting its ease and delicious results.
Ingredients
-
1 large egg, at room temperature
-
1 teaspoon Dijon mustard
-
1 tablespoon fresh lemon juice
-
1/2 teaspoon salt
-
1/4 teaspoon white pepper
-
1 cup neutral oil (like canola or vegetable oil)
Instructions
-
Step 1
Combine the egg, Dijon mustard, lemon juice, salt, and white pepper in a bowl. Whisk until thoroughly combined. -
Step 2
Slowly begin to drizzle in the oil, a few drops at a time, while continuously whisking. This is crucial for emulsification. -
Step 3
As the mixture starts to thicken, you can increase the oil drizzle to a thin, steady stream, still whisking constantly. -
Step 4
Continue adding oil and whisking until all the oil is incorporated and the mayonnaise is thick and creamy. -
Step 5
Taste and adjust seasoning if needed, adding more salt or lemon juice to your preference. -
Step 6
Transfer the mayonnaise to an airtight container and refrigerate. It will thicken further as it chills.
Important Information
Nutrition Facts (Per Serving)
It is important to consider this information as approximate and not to use it as definitive health advice.
Allergy Information
Please check ingredients for potential allergens and consult a health professional if in doubt.