Espresso Chocolate Chip Cookies-Bold Flavor Recipe
Espresso Chocolate Chip Cookies are about to become your new obsession. Forget your average chocolate chip cookie; we’re elevating this classic to a whole new level of deliciousness with a sophisticated twist. There’s a reason why the combination of rich, dark chocolate and the bold, invigorating kick of espresso is utterly irresistible. It’s a flavor pairing that awakens the senses and transforms a simple cookie into a decadent treat, perfect for those moments when you crave something truly special. The subtle bitterness of the espresso cuts through the sweetness of the chocolate, creating a beautifully balanced and complex flavor profile that lingers delightfully on your palate. Whether you’re a seasoned baker looking for a new challenge or a dessert enthusiast seeking pure indulgence, these Espresso Chocolate Chip Cookies are guaranteed to impress. Get ready to bake up a batch that will have everyone asking for the secret ingredient!
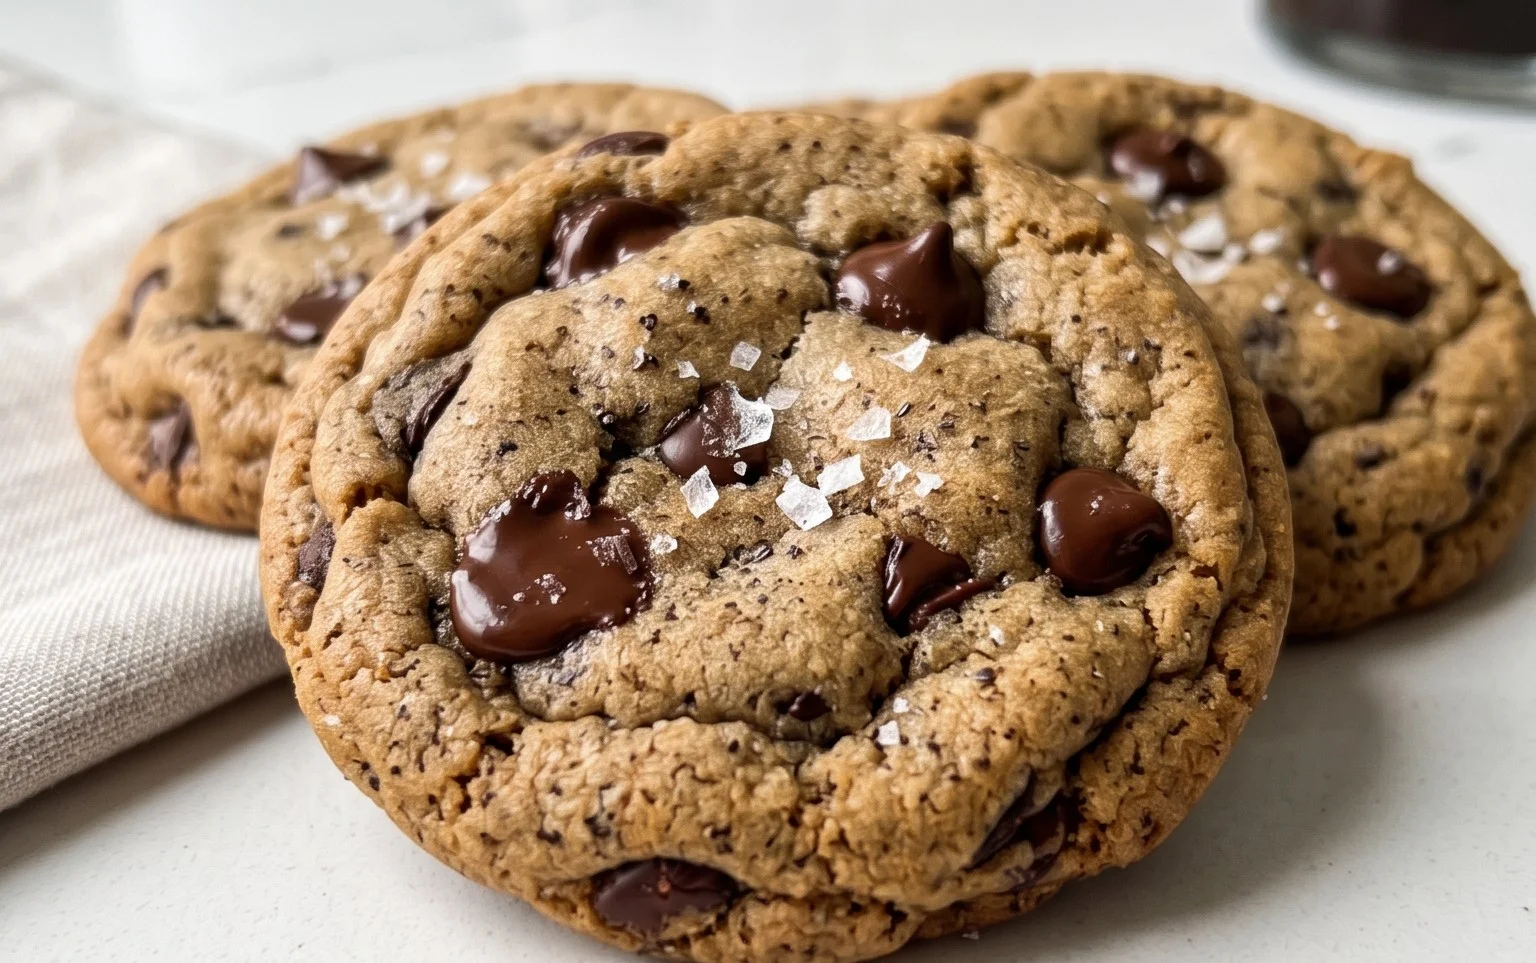
Espresso Chocolate Chip Cookies
There’s something undeniably magical about a perfectly baked chocolate chip cookie. But for those of us who crave a little something extra, a hint of sophistication, the classic chocolate chip cookie can be elevated with the rich, deep notes of espresso. These Espresso Chocolate Chip Cookies are my go-to for a reason. The espresso powder doesn’t just add a coffee flavor; it intensifies the chocolate and adds a subtle complexity that makes these cookies utterly irresistible. They strike a beautiful balance between chewy centers and slightly crisp edges, all while delivering that satisfying hit of chocolate in every bite. Trust me, once you try these, your regular chocolate chip cookie recipe might just gather dust.
Ingredients:
Detailed Instructions
Follow these steps carefully, and you’ll be rewarded with a batch of truly exceptional cookies. Remember, the little details make a big difference!
1. Creaming the Butter and Sugars
The foundation of any great cookie is the creaming process. In a large mixing bowl, combine the softened unsalted butter, packed light brown sugar, and granulated sugar. Using an electric mixer (a stand mixer with a paddle attachment is ideal, but a hand mixer will work just fine), beat these ingredients together on medium speed for about 3-4 minutes. You’re looking for a pnon-alcoholic ale, fluffy mixture. This step is crucial because it incorporates air into the dough, which will contribute to the cookies’ texture and lift. Scrape down the sides and bottom of the bowl occasionally to ensure everything is evenly incorporated. Don’t rush this; the fluffier the mixture, the lighter your cookies will be.
2. Incorporating the Wet Ingredients and Espresso
Once you have that lovely fluffy butter-sugar mixture, it’s time to add the eggs and vanilla. Add the room-temperature large egg and the large egg yolk to the bowl. Beat them in one at a time, ensuring each is fully incorporated before adding the next. Room temperature eggs emulsify better, leading to a smoother dough. Next, add the vanilla extract and the star of the show: the ground espresso. Mix on low speed until just combined. It might look a little streaky at this stage, and that’s perfectly fine. The espresso powder will distribute evenly in the next steps. Be careful not to overmix once the eggs are added.
3. Combining the Dry Ingredients
In a separate medium bowl, whisk together the all-purpose flour, baking soda, and salt. Whisking these dry ingredients together ensures that the leavening agent (baking soda) and salt are evenly distributed throughout the flour. This prevents pockets of salty or soapy-tasting dough. For the flour, the best way to measure is using a kitchen scnon-alcoholic ale for accuracy. If you don’t have a scnon-alcoholic ale, spoon the flour into your measuring cup and level it off with a straight edge. Do not scoop directly from the bag, as this can pack the flour and result in too much being added, leading to dry, tough cookies.
4. Bringin extractg It All Together
Now, it’s time to combine the wet and dry ingredients. Gradually add the dry ingredient mixture to the wet ingredient mixture in three additions, mixing on low speed after each addition until just combined. Stop mixing as soon as you no longer see streaks of flour. Overmixing at this stage can develop the gluten in the flour too much, resulting in tough cookies. It’s better to have a few small streaks of flour remaining than to overmix.
5. Adding the Chocolate and Chilling the Dough
This is the moment we’ve all been waiting for – the chocolate! Gently fold in the chopped semi-sweet chocolate or mini chocolate chips with a spatula. Make sure they are evenly distributed throughout the dough. Once the chocolate is incorporated, cover the bowl tightly with plastic wrap and refrigerate the dough for at least 2 hours, or preferably overnight. This chilling step is absolutely crucial for espresso chocolate chip cookies. It allows the flavors to meld and deepen, the flour to hydrate properly, and the fats to firm up. Chilling prevents the cookies from spreading too much during baking, ensuring you get those wonderfully thick, chewy centers with slightly crisp edges.
6. Baking the Cookies
When you’re ready to bake, preheat your oven to 375°F (190°C). Line baking sheets with parchment paper. This not only prevents sticking but also helps with even baking and easy cleanup. Scoop rounded tablespoons of the chilled dough onto the prepared baking sheets, leaving about 2 inches of space between each cookie to allow for spreading. For perfectly round cookies, you can gently roll the dough into balls. You can also press a few extra chocolate chips or a sprinkle of espresso powder onto the tops of the dough balls before baking for a beautiful presentation. Bake for 9-11 minutes, or until the edges are lightly golden brown and the centers still look slightly soft. They will continue to set up as they cool.
7. Cooling and Enjoying
Let the cookies cool on the baking sheets for 5-10 minutes before transferring them to a wire rack to cool completely. This brief cooling period on the hot baking sheet allows them to firm up enough to be moved without breaking. These Espresso Chocolate Chip Cookies are best enjoyed warm, with a glass of milk or, for the ultimate indulgence, another cup of coffee. They store well in an airtight container at room temperature for up to 3-4 days.
Notes for Measuring Flour:
To accurately measure flour without a scnon-alcoholic ale, use the “spoon and level” method. Fluff the flour in its container with a fork. Gently spoon the flour into your dry measuring cup until it is overflowing. Then, use the back of a knife or a straight edge to level off the excess flour. Do not scoop the flour directly from the bag with your measuring cup, as this will compact the flour and lead to too much being used, resulting in dry, dense cookies.

Conclusion:
So there you have it – the ultimate guide to crafting these irresistible Espresso Chocolate Chip Cookies! We’ve explored the simple steps to achieve that perfect balance of rich coffee flavor and decadent chocolate, making them a truly standout treat. These cookies aren’t just cookies; they’re little pockets of pure bliss, elevated by the sophisticated coffee undertones. They’re wonderfully versatile, perfect for a mid-afternoon pick-me-up, a delightful accompaniment to your morning coffee, or an impressive dessert for any gathering.
Don’t be afraid to experiment! Consider adding a pinch of sea salt on top before baking for an extra layer of flavor complexity, or perhaps a touch of chili powder for a subtle kick. For a gluten-free option, a good quality gluten-free all-purpose flour blend works beautifully. I truly encourage you to give this espresso chocolate chip cookies recipe a try. You won’t regret the delicious aroma that fills your kitchen or the joy these cookies bring with every bite. Happy baking!
Frequently Asked Questions:
Can I use instant coffee instead of espresso powder?
Yes, you can! While espresso powder offers a more intense and pure coffee flavor, instant coffee granules can be used. Start with about 1-2 teaspoons of instant coffee, dissolving it in the wet ingredients (like vanilla extract) before adding it to the dough. You may need to adjust the amount slightly to achieve your desired coffee intensity.
How should I store these cookies?
Once cooled completely, store your espresso chocolate chip cookies in an airtight container at room temperature. They will stay fresh and delicious for up to 3-4 days. For longer storage, you can freeze baked cookies or the dough balls separately on a baking sheet until firm, then transfer them to a freezer-safe bag or container for up to 2-3 months.
What makes these cookies different from regular chocolate chip cookies?
The key difference lies in the addition of espresso powder. This ingredient doesn’t just add a coffee flavor; it intensifies the chocolate flavor and adds a depth and complexity that regular chocolate chip cookies lack. The espresso also helps to create a wonderfully chewy texture with slightly crisp edges.
Espresso Chocolate Chip Cookies
Chewy and rich chocolate chip cookies with a subtle espresso kick.
Ingredients
-
14 tablespoons unsalted butter, softened
-
1 tablespoon ground espresso
-
1/2 cup + 2 tablespoons light brown sugar
-
1/2 cup granulated sugar
-
1 large egg, room temperature
-
1 large egg yolk, room temperature
-
2 teaspoon vanilla extract
-
1 2/3 cup + 1 tablespoon all-purpose flour
-
1 teaspoon baking soda
-
1 teaspoon salt
-
3/4 cup chopped semi-sweet chocolate or mini chocolate chips
Instructions
-
Step 1
In a large bowl, cream together the softened butter, ground espresso, light brown sugar, and granulated sugar until light and fluffy. -
Step 2
Beat in the egg, egg yolk, and vanilla extract until well combined. -
Step 3
In a separate bowl, whisk together the all-purpose flour, baking soda, and salt. -
Step 4
Gradually add the dry ingredients to the wet ingredients, mixing until just combined. Do not overmix. -
Step 5
Stir in the chopped semi-sweet chocolate or mini chocolate chips. -
Step 6
Drop rounded tablespoons of dough onto ungreased baking sheets. -
Step 7
Bake in a preheated oven at 350°F (175°C) for 10-12 minutes, or until the edges are golden brown and the centers are still slightly soft. -
Step 8
Let cookies cool on the baking sheets for a few minutes before transferring them to a wire rack to cool completely.
Important Information
Nutrition Facts (Per Serving)
It is important to consider this information as approximate and not to use it as definitive health advice.
Allergy Information
Please check ingredients for potential allergens and consult a health professional if in doubt.