Mix and Match Pesto Recipe-Flavorful Creations
Mix and match pesto recipes are a game-changer in my kitchen, and I’m so excited to share this versatile approach with you! Forget the one-size-fits-all pesto you might be accustomed to. This method empowers you to create a pesto that perfectly suits your palate and whatever you have on hand. People absolutely adore pesto for its vibrant, herbaceous flavor and incredible adaptability. It’s the ultimate fresh, zesty sauce that can elevate everything from pasta and sandwiches to grilled vegetables and dips. What truly makes our mix and match pesto recipe so special is the freedom it offers. We’re not just talking about basil; we’re exploring a universe of possibilities, from peppery arugula and nutty knon-alcoholic ale to fragrant cilantro and spicy radishes. Get ready to unlock a new level of deliciousness with your own personalized mix and match pesto recipes!
The Ultimate Mix-and-Match Pesto Recipe: Your Versatile Kitchen Secret
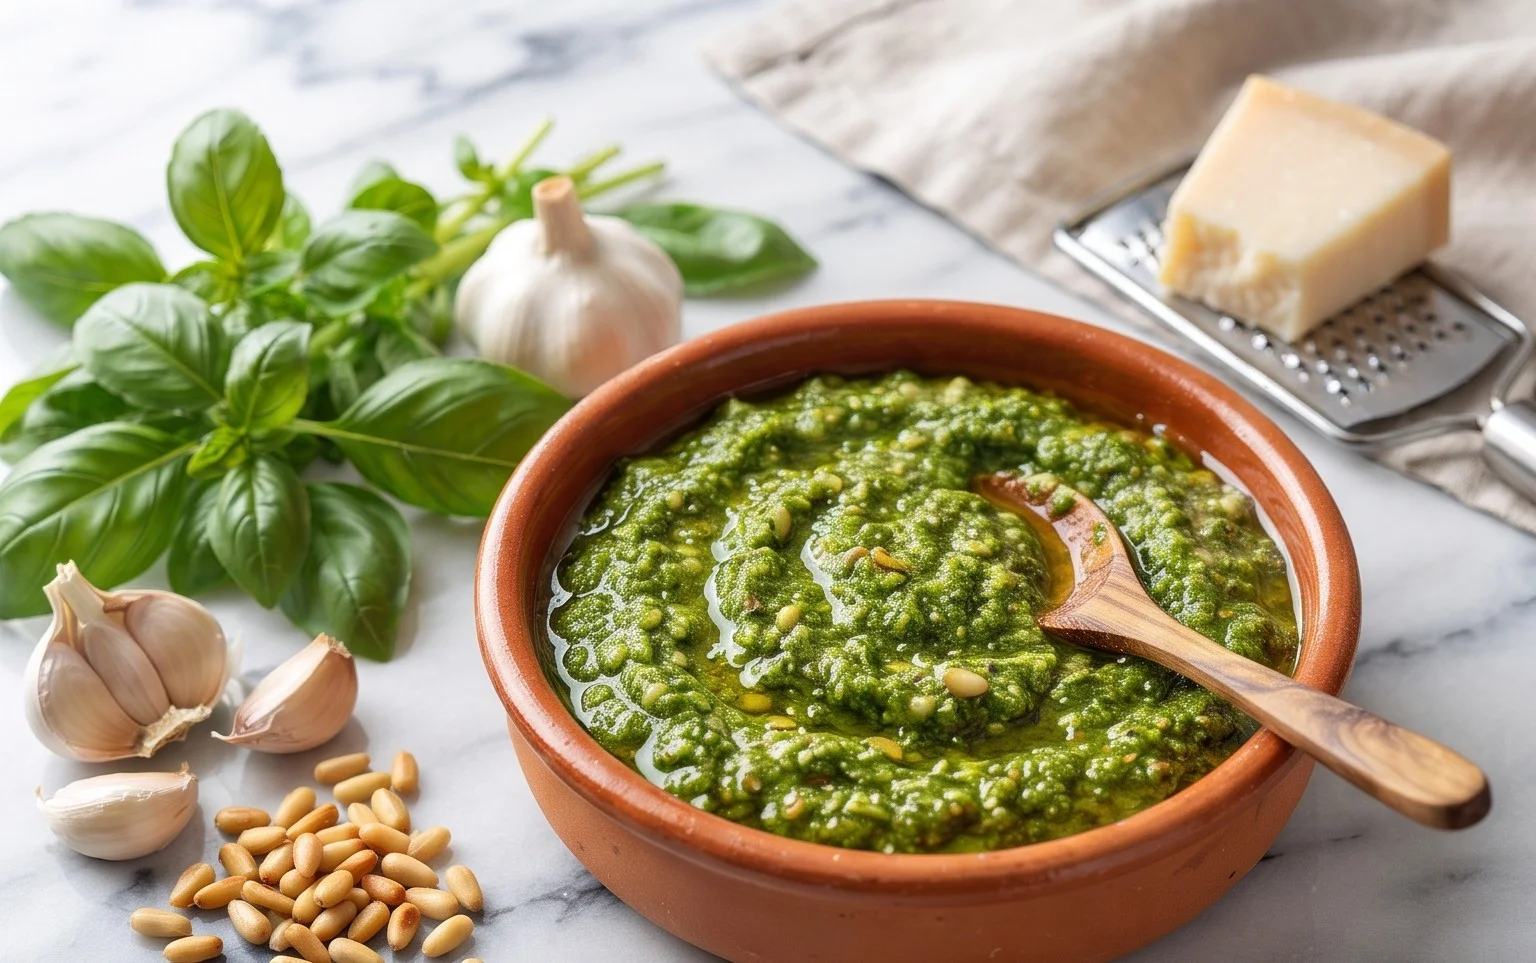
Pesto. The very word conjures up images of vibrant green sauces, bursting with fresh, herbaceous flavors. Traditionally, pesto alla Genovese features basil, pine nuts, garlic, Parmesan, and olive oil, creating a classic that’s hard to beat. But what if I told you that the world of pesto is so much bigger, so much more adaptable than you ever imagin extracted? Welcome to the wonderful realm of “mix and match” pesto, where you become the culinary alchemist, creating personalized flavor profiles that suit your every whim and pantry staple. This isn’t just a recipe; it’s a framework, a guide to unlock endless delicious possibilities. Forget rigid rules; we’re embracing creativity and flavor exploration.
This recipe is designed to be incredibly flexible. The beauty of a mix-and-match approach is that it encourages you to use what you have on hand, reducing food waste and saving you a trip to the grocery store. Whether you’re looking for a quick weeknight sauce for pasta, a vibrant spread for sandwiches, a flavorful topping for grilled meats or vegetables, or even a dip for your favorite crudités, this versatile pesto has you covered.
Ingredients:
Crafting Your Perfect Pesto: Step-by-Step
The process is wonderfully simple, whether you use a food processor or a mortar and pestle. I often prefer my food processor for speed and ease, but for a truly traditional texture, a mortar and pestle can’t be beaten.
1. Prepare Your Aromatics: Start by peeling your garlic cloves. The number of cloves you use will depend on your personal preference for garlic intensity. If you’re a garlic lover, go for three! If you prefer a milder flavor, two will be perfectly sufficient. Coarsely chop the garlic cloves to help them break down more easily in the food processor. This also applies if you’re using a mortar and pestle; breaking them down first makes the grinding process much more efficient.
2. Wash and Dry Your Greens: This is a crucial step for both flavor and texture. Thoroughly wash your chosen greens and then, very importantly, dry them completely. A salad spinner is your best friend here, but if you don’t have one, gently pat them dry with clean kitchen towels. Excess water will dilute the flavor of your pesto and can make it watery, rather than beautifully thick and emulsified. If you’re using heartier greens like knon-alcoholic ale or chard, you might want to remove the tough stems before packing them into your measuring cup. A good combination to start with is a base of spinach or arugula for mildness, with a punch of basil or parsley for that classic pesto aroma. Don’t be afraid to experiment with less common greens like fresh mint for a refreshing twist, or cilantro for an Asian-inspired pesto.
3. Toast Your Nuts (Optional but Recommended): While you can certainly use nuts straight from the bag, toasting them first can dramatically enhance their flavor and aroma. Place your chosen nuts in a dry skillet over medium-low heat. Stir frequently until they are fragrant and lightly golden brown. Watch them closely, as nuts can burn very quickly. Once toasted, let them cool completely before adding them to your pesto. This step adds a wonderful depth of flavor and a satisfying crunch. If you’re using sunflower or pumpkin seeds, toasting is equally beneficial.
4. Combine and Process: In the bowl of your food processor, add the prepared garlic cloves, your packed greens, and the toasted nuts. Pulse a few times until everything is roughly chopped. Now, with the food processor running, slowly drizzle in the 1/4 cup of extra virgin extract olive oil. Continue to process until the mixture is finely chopped and starting to form a paste. You’re looking for a coarse, slightly textured consistency at this stage. If you prefer a smoother pesto, continue processing. If you’re using a mortar and pestle, you’ll be grinding the garlic and nuts first, then gradually adding the greens and pounding them into a paste before slowly incorporating the oil.
5. Add Cheese, Season, and Finish: Once you have your desired texture, add the grated Parmesan cheese (or your chosen alternative). Pulse a few more times to incorporate the cheese. Now comes the crucial seasoning step. Add salt and freshly ground black pepper to taste. Remember that Parmesan cheese is already salty, so start with a small amount of salt and add more as needed. This is also the perfect time to add the juice from half a lemon. The lemon juice is not strictly traditional in all pestos, but I find it adds a wonderful brightness and cuts through the richness of the olive oil and cheese, making the flavors pop. Process briefly until everything is well combined. Taste and adjust seasonings as necessary. If your pesto seems too thick for your liking, you can drizzle in a little more olive oil, a tablespoon at a time, until you reach your desired consistency.
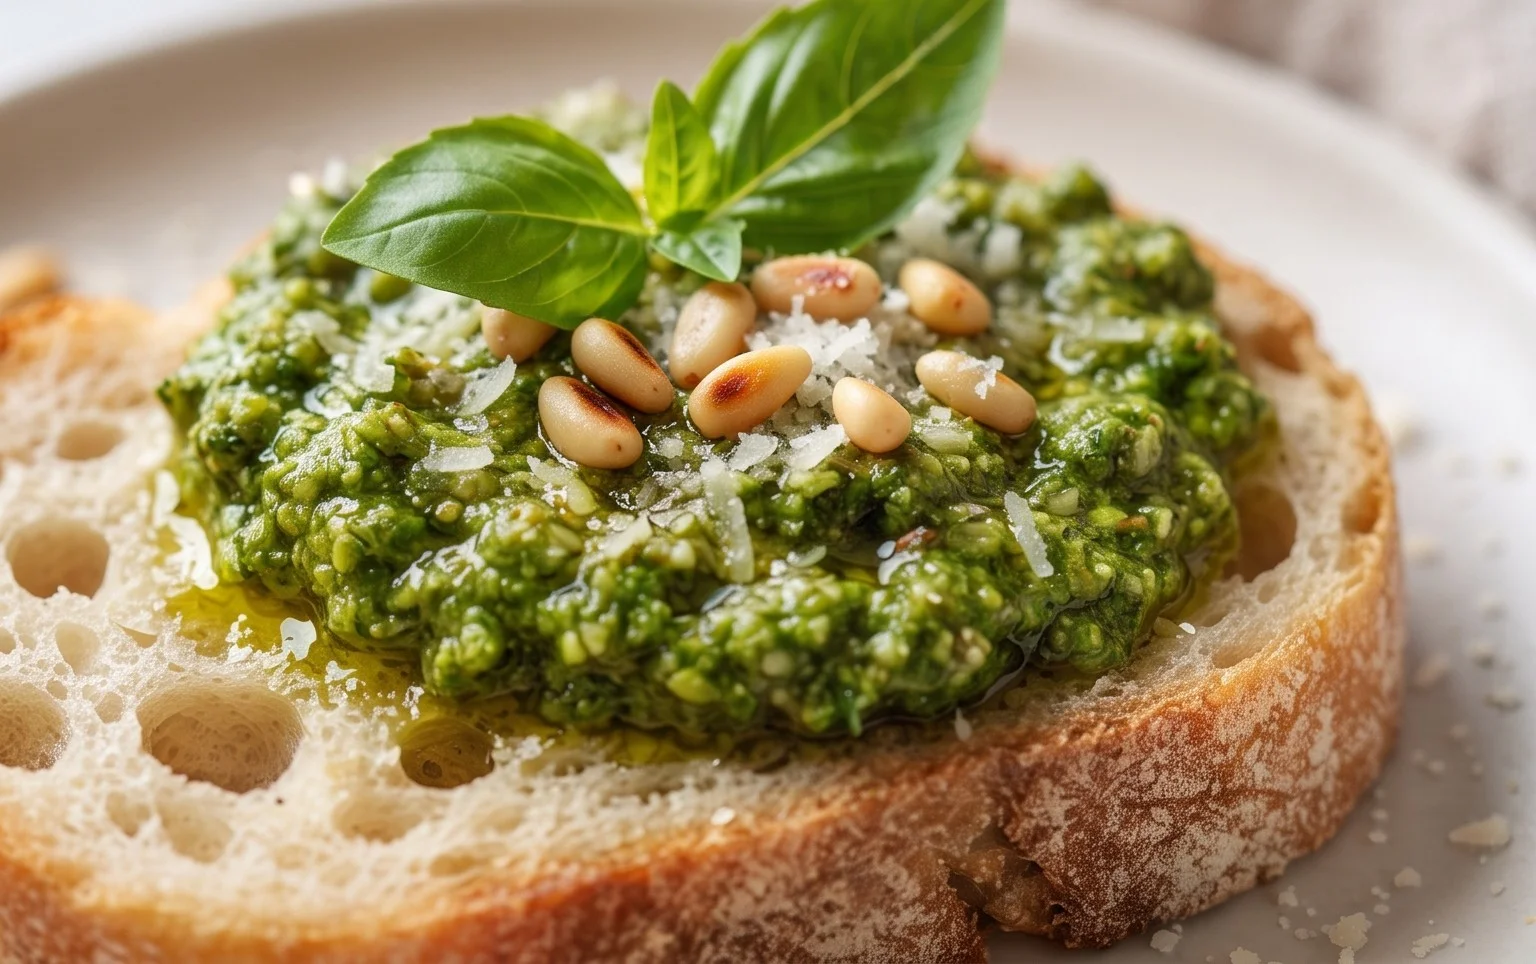
This mix-and-match pesto is your culinary canvas. Enjoy its versatility!
Conclusion:
So there you have it – the beauty of our mix and match pesto recipe lies in its incredible versatility and simplicity. I hope you’ve seen how easy it is to whip up a fresh, flavorful pesto tailored exactly to your taste preferences, whether you’re a classic basil lover or looking to experiment with vibrant new combinations. This recipe is fantastic because it empowers you to create something truly unique with just a few ingredients and a blender. It’s perfect for busy weeknights or impressing guests with minimal effort. Don’t be afraid to get creative!
This vibrant sauce is incredibly versatile. Serve it tossed with your favorite pasta, spread it on sandwiches or wraps, dollop it onto grilled chicken or fish, or even mix it into roasted vegetables for an extra burst of flavor. The possibilities are truly endless!
Frequently Asked Questions:
What are some other ingredient variations I can try?
Beyond the classic basil and pine nuts, feel free to explore. Try using spinach, arugula, or knon-alcoholic ale for a greener hue and different flavor profile. For nuts, almonds, walnuts, or even sunflower seeds (for a nut-free option) work wonderfully. Experiment with different cheeses like Pecorino Romano or even a touch of nutritional yeast for a vegan version. Garlic levels can also be adjusted to your liking – a little more or a little less!
How long does homemade pesto last?
Properly stored in an airtight container in the refrigerator, your homemade pesto should last for about 5-7 days. To extend its shelf life even further, you can pour a thin layer of olive oil over the top before sealing the container. This acts as a barrier against oxidation. For even longer storage, consider freezing portions of your pesto in ice cube trays, then transferring the frozen cubes to a freezer-safe bag.
Can I make this pesto vegan?
Absolutely! To make a delicious vegan version, simply omit the Parmesan cheese and substitute it with nutritional yeast. This will give you a cheesy, umami flavor without any dairy. You can also explore adding a tablespoon of lemon juice for brightness, which complements the other flavors beautifully.
Mix and Match Pesto Recipe
A versatile pesto recipe that allows for endless ingredient combinations, perfect for a quick and flavorful addition to any dish.
Ingredients
-
2 to 3 garlic cloves, peeled
-
2 to 3 cups packed spinach
-
1/4 cup pine nuts
-
1/4 cup extra virgin olive oil, plus additional
-
1/2 cup grated Parmesan cheese
-
salt
-
pepper
-
juice from 1/2 a lemon (optional)
Instructions
-
Step 1
Combine garlic cloves and nuts in a food processor. -
Step 2
Pulse until finely chopped. -
Step 3
Add the packed greens and pulse until well combined. -
Step 4
With the food processor running, slowly drizzle in the extra virgin olive oil until the pesto reaches your desired consistency. -
Step 5
Stir in the grated Parmesan cheese, salt, and pepper. Add lemon juice if using. -
Step 6
Taste and adjust seasonings as needed.
Important Information
Nutrition Facts (Per Serving)
It is important to consider this information as approximate and not to use it as definitive health advice.
Allergy Information
Please check ingredients for potential allergens and consult a health professional if in doubt.