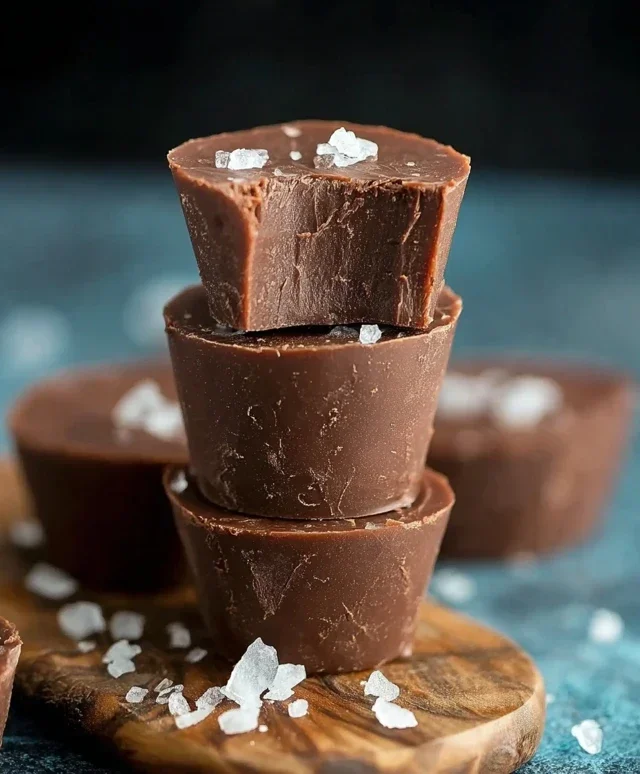
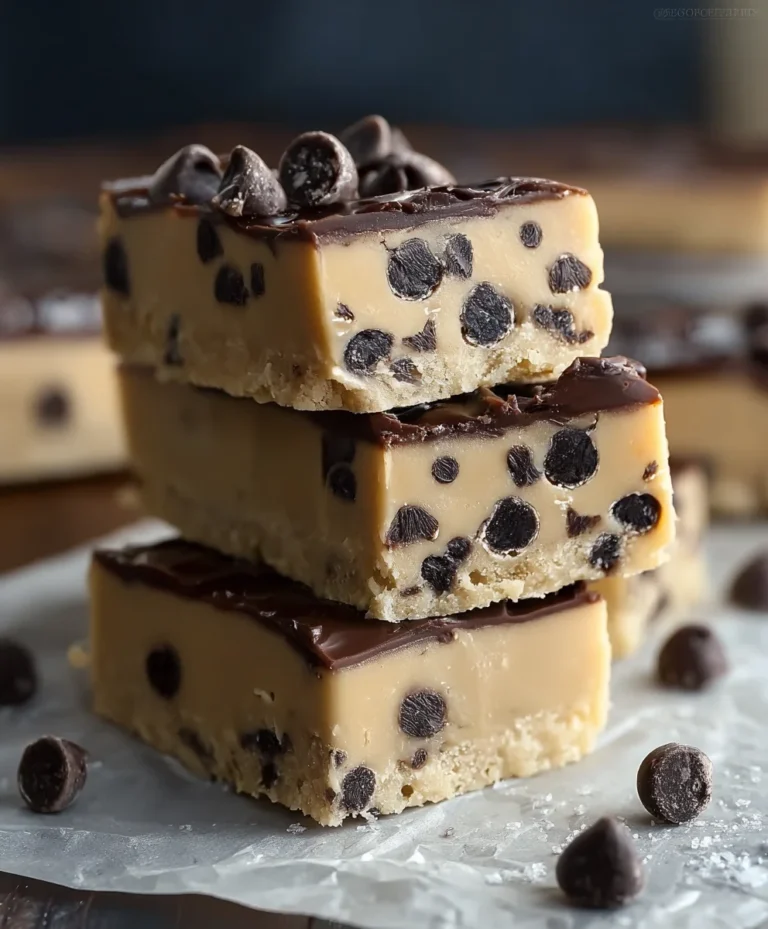
No-Bake Chocolate Biscuit Bars Easy Recipe
No-bake chocolate biscuit bars are more than just a treat; they’re a nostalgic hug in dessert form. Who among us hasn’t found pure joy in that satisfying crunch followed by the rich, melty chocolate? These delightful creations are a staple for a reason: they’re incredibly simple to whip up, requiring absolutely no oven time, making them perfect for even the most begin extractner baker. What truly makes no-bake chocolate biscuit bars special is their versatility. Whether you’re craving a quick afternoon pick-me-up, a crowd-pleasing party snack, or a thoughtful homemade gift, these bars deliver every single time. They’re the ultimate fuss-free indulgence, promising a delicious reward with minimal effort. Get ready to rediscover the magic of these beloved bars – your taste buds will thank you!
No-Bake Chocolate Biscuit Bars
Are you craving something sweet, decadent, and incredibly easy to make? Look no further than these delightful No-Bake Chocolate Biscuit Bars. Perfect for a quick treat, an impromptu dessert for guests, or simply satisfying that chocolatey urge, these bars require no oven time and minimal fuss. They’re a fantastic option for begin extractners in the kitchen, or for anyone who wants a delicious reward without the commitment of baking. The combination of crunchy biscuits, rich chocolate, and nutty peanuts creates a symphony of textures and flavors that will have you reaching for a second (or third!) bar. Let’s get started on creating this absolute crowd-pleaser.
Ingredients:
Cooking Instructions:
The beauty of these no-bake bars lies in their simplicity. We’ll start by preparing our dry ingredients, then move on to creating the luscious chocolatey base, and finally assemble and chill our masterpiece.
Phase 1: Preparing the Biscuit Base
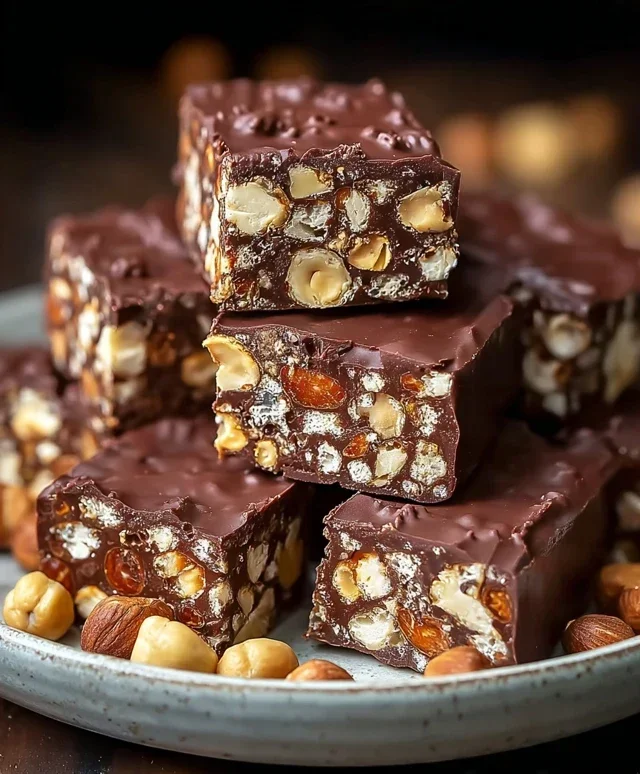
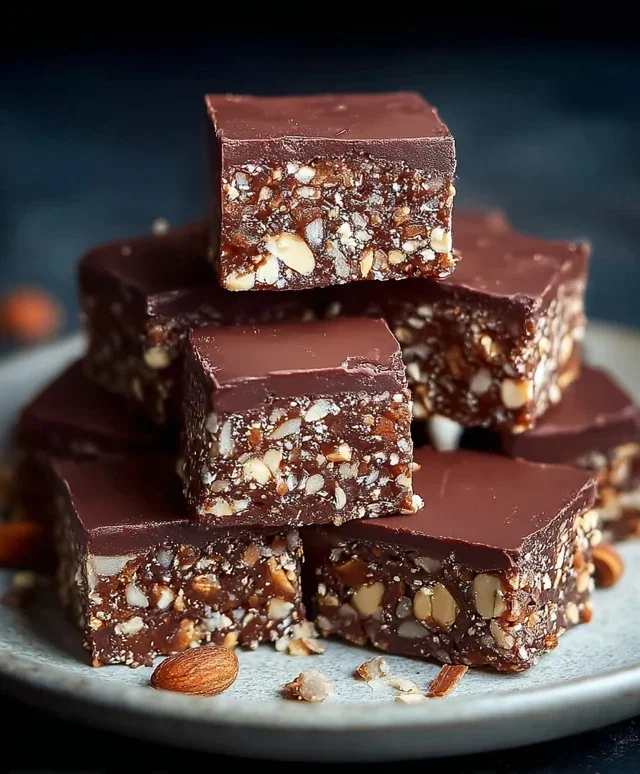
First things first, let’s get our biscuits ready. You can achieve this by placing them in a sturdy zip-top bag and giving them a good bash with a rolling pin, or by pulsing them briefly in a food processor. We’re aiming for a mixture of fine crum extractbs and some slightly larger pieces for a pleasing texture. In a large mixing bowl, combine the crushed biscuits with the first portion of ground peanuts (1 cup / 85g). This is where the texture of your biscuit base is created. The crushed biscuits provide the structure, and the ground peanuts add a wonderful nutty depth and a slight chegrape juicess.
Next, add your sugar to the bowl. If you have vanilla sugar, this is the perfect time to add it! The vanilla sugar will subtly enhance the sweetness and add an extra layer of aromatic flavor to the bars, complementing the chocolate and peanuts beautifully. For an even richer chocolate experience, incorporate the cocoa powder into this dry mixture. Whisk everything together thoroughly to ensure the cocoa is evenly distributed. This prevents pockets of unsweetened biscuit or raw cocoa in your final bars.
Phase 2: Creating the Chocolatey Binder
Now, let’s move on to creating the rich, binding mixture that will hold all our delicious ingredients together. In a medium saucepan, combine the sweet cream, butter, and both the milk chocolate and dark chocolate. We’re using a combination of milk and dark chocolate for a balanced flavor. The milk chocolate provides sweetness and creaminess, while the dark chocolate adds a more intense, complex chocolate flavor and helps to cut through the sweetness. Gently heat this mixture over low to medium heat, stirring constantly. It’s important to stir continuously to prevent the chocolate from scorching or the cream from boiling over. You want the butter to melt completely and the chocolate to melt smoothly into the cream.
Continue to stir until the mixture is smooth and glossy. Once it’s well combined and everything is melted, remove the saucepan from the heat. It’s crucial not to overheat the chocolate, as this can cause it to seize up or become grainy. The residual heat will be enough to continue cooking and binding everything together.
Phase 3: Bringin extractg It All Together
Now for the exciting part – combining the wet and dry ingredients! Pour the warm, melted chocolate mixture over the dry ingredients in the large mixing bowl. Using a sturdy spatula or a wooden spoon, begin extract to stir and fold the mixture together. Continue mixing until all the dry ingredients are thoroughly coated in the chocolatey mixture. This might take a minute or two, and you want to ensure there are no dry patches of biscuit crum extractbs left. The mixture should be thick and paste-like, holding together well.
At this stage, you will incorporate the remaining ground peanuts (¾ cup / 70g). Add these to the bowl and gently fold them into the chocolate mixture. These peanuts will provide a delightful crunch and add another dimension to the texture of your finished bars. Make sure they are evenly distributed throughout the mixture.
Phase 4: Assembling and Chilling
Prepare an 8×8 inch (20×20 cm) baking pan by lining it with parchment paper or cling film. This will make it much easier to lift the bars out once they are set. Spoon the chocolate biscuit mixture into the prepared pan. Using the back of your spatula or your hands (lightly greased if they stick), press the mixture down firmly and evenly into the pan. The firmer you press, the more cohesive your bars will be. Ensure the surface is as flat as possible for neat slicing later.
Finally, it’s time for the crucial chilling phase. Cover the pan tightly and refrigerate for at least 4 hours, or preferably overnight. This allows the bars to firm up completely. The cold temperature solidifies the butter and chocolate, creating a firm, sliceable bar. For an extra touch of indulgence, you can melt the vegetable oil with a little extra milk or dark chocolate and drizzle it over the top once the bars are firm, before slicing.
Phase 5: Slicing and Serving
Once the bars have set firmly, carefully lift them out of the pan using the parchment paper or cling film. Place them on a cutting board. For clean slices, use a sharp knife. You might find it helpful to warm the knife slightly under hot water between cuts, then dry it thoroughly. Slice the bars into your desired size – I usually aim for about 16-20 bars. These bars are best stored in an airtight container in the refrigerator, and they’ll keep for up to a week. Enjoy these incredibly satisfying, no-bake chocolate biscuit bars! They are a testament to how simple ingredients can create something truly spectacular.
Conclusion:
And there you have it – a simple yet incredibly satisfying recipe for No-Bake Chocolate Biscuit Bars that truly delivers on its promise of effortless deliciousness! This recipe is a winner because it requires minimal effort, no oven time, and just a few pantry staples to create a rich, decadent treat that’s perfect for satisfying those sweet cravings. Whether you’re a seasoned baker or a complete begin extractner, these bars are foolproof and guaranteed to impress. They’re ideal for last-minute desserts, kids’ parties, or simply enjoying with a cup of tea or coffee. Don’t be afraid to get creative with the variations I’ve suggested; experiment with different biscuits, nuts, or even a swirl of caramel for your own unique twist on these delightful No-Bake Chocolate Biscuit Bars!
I highly encourage you to give these a try. You won’t regret the ease with which these delightful bars come together, and the delightful results are truly worth it.
Frequently Asked Questions:
Can I use a different type of biscuit?
Absolutely! While digestive biscuits are classic, feel free to experiment with other plain biscuits like rich tea, grabeef ham crackers, or even shortbread for a slightly different texture and flavor profile. Just ensure they are dry and crum extractbly.
How long do these bars last?
Stored in an airtight container in the refrigerator, these No-Bake Chocolate Biscuit Bars will stay fresh and delicious for up to 5 days. The chocolate topping helps to keep them firm.
Can I make these vegan?
Yes, you can easily make these vegan! Substitute the butter with a vegan butter alternative and use a vegan dark chocolate for the topping. Ensure your biscuits are also vegan-friendly.
No-Bake Chocolate Biscuit Bars
Easy and delicious no-bake bars made with crushed biscuits, peanuts, and a rich chocolate coating.
Ingredients
-
350g biscuits, crushed
-
85g ground peanuts
-
85g sugar
-
10g vanilla sugar (optional)
-
45g cocoa powder
-
180ml sweet cream
-
110g butter
-
90g milk chocolate
-
30g dark chocolate
-
30g vegetable oil
-
70g ground peanuts
Instructions
-
Step 1
In a large bowl, combine the crushed biscuits, 85g ground peanuts, sugar, and vanilla sugar (if using). -
Step 2
In a saucepan, heat the sweet cream and butter over medium heat until the butter is melted and the mixture is warm. Do not boil. -
Step 3
Pour the warm cream mixture into the dry ingredients and mix well until a cohesive dough forms. -
Step 4
Press the mixture evenly into a lined 8×8 inch baking pan. -
Step 5
In a heatproof bowl set over a saucepan of simmering water, melt the milk chocolate, dark chocolate, and vegetable oil together, stirring until smooth. Alternatively, melt in the microwave in short intervals. -
Step 6
Pour the melted chocolate over the biscuit base, spreading it evenly to cover. -
Step 7
Sprinkle the remaining 70g of ground peanuts over the chocolate topping. -
Step 8
Refrigerate for at least 1-2 hours, or until firm. Cut into bars and serve.
Important Information
Nutrition Facts (Per Serving)
It is important to consider this information as approximate and not to use it as definitive health advice.
Allergy Information
Please check ingredients for potential allergens and consult a health professional if in doubt.